Showing posts with label 30 minute meal. Show all posts

Tuesday, January 6, 2015

Sausage Swiss Chard Pasta

We participate in Bountiful Baskets.  Haven't heard of Bountiful Baskets?  Go to bountifulbaskets.org.  It's a food coop.  Fresh produce delivered to many areas.  Got two beautiful bunches of Rainbow Swiss Chard in the last basket.


 What to do with it?  I've only had it sauteed in butter.  Which is delicious but I wanted a little something more.  I have some fresh elk sausage in the freezer I've been wanting to try.  Whipped a pound of Italian Elk Sausage out of the freezer and browned it in a skillet.  (And yes, I harvested the elk.) Added some butter (the real stuff) and piled an entire bunch of the Swiss Chard which I had chopped on top of that.  While that was cooking, I started a pot of water boiling for pasta.  Had a bit of veggie spirals and a bit of rotini.  While that was cooking I found a jar of Ragu Parmesan Garlic Sauce in the pantry.  Ah hah!  Poured that over the top.  Of course I didn't take pictures as I was making this up as I went.  Honey Badger Mia and her spouse was here and reminded me I should post this....  Thanks Mia!  When it was all hot and finished cooking.  We spooned the sausage swiss chard mixture over the pasta.  And it was delicious!


In this picture you can see all the delicious components -- the green, red and orange of the swiss chard, the yummy sausage, the different pastas and the parmesan garlic pasta sauce.


It was appealing to the eye and yummy.  Not to mention easy!

Thursday, October 23, 2014

Short-Rib Slider With Polenta Fries!


Last week I posted two delicious recipes that went GREAT together. So here I go again.. This slider made with left-over short-rib with crunchy polenta fries is the perfect combo AGAIN! One meal turning right into two. Yes! Its amazing, I know! So what you waiting for?

Go to last weeks posts and whip em up to have this amazing set of meals!!


Lets begin! Short-Rib slider with polenta fries! 


Looks delicious, huh? 


Short-Rib Slider

Pretzel slider buns
Chopped/Shredded leftover short ribs
Aged gouda cheese
Horseradish sauce

Slightly toast your bun in a toaster oven. Take out and spread horseradish sauce on both sides. Take bottom bun and pile on the short rib with a few thin slices of cheese. As much as you like. Toast bottom bun with toppings until cheese is bubbly. Toast top bun until desired crunch, just doesn't need to toast as long as the bottom. 


Polenta Fries

Leftover polenta
2-3 Tablespoons of butter (Depending on how many fries you make)
Dash of salt

Your leftover creamy polenta will thicken overnight in the fridge. Being in a casserole dish you can take a slice out and easily cut it down into strip fry shapes. Melt butter in a pan over medium high heat. Saute fries rolling around to all sides and allow to fry until all sides have a crunchy golden consistency. Allow to dab dry on a paper towel.

Serve Slider with fries and ENJOY!


Wednesday, October 15, 2014

Creamy MICROWAVE Polenta


....PART ONE TO A DELICIOUS MEAL....
...Part Two Tomorrow...

These cold fall days have had me in the mood for a warm hearty meal. With some family raised beef in the freezer, short ribs seemed fitting for the mood I have been in. Anyways when I think short ribs I think soft polenta to serve it on. I grew up eating polenta in my Swiss family, Even included it on the menu at my own wedding. Its a delicious and inexpensive but above all CLASSY side dish. Years ago in Switzerland it was considered peasant food because its JUST corn meal and water. Thats it. There is so much you can add to it to make it a jazzy amazing dish. 

Here is a quick easy way to whip up some polenta in your home in short order.

Want a spoon? fork? you hands? Go for it! Don't blame you!! 

Creamy Microwave Polenta
2 Cups cornmeal
7  Cups water
1 Tablespoon olive oil
2 Teaspoons salt
4 Tablespoons butter
1/2-3/4 Cups shredded cheese (Any kind your prefer, parmesan, cheddar, jack, gouda)

Combine all ingredients except for butter and cheese in a large glass or stoneware dish that leaves enough space for water to bubble up without overflowing. Cover tightly with saran wrap and microwave on high for 14 minutes.
Carefully uncover dish and stir your mixture. Should still be watery but beginning to thicken. Add a splash more water if your mixture is clumpy or stiff. After stirring re-cover and microwave on high for another 12-14 minutes.

Again, carefully uncover and stir. Polenta should be thickened but not stiff. Add butter and cheese and stir in. Taste and add anything more of anything that you desire.

Serve as a side dish or under PART TWO to this amazing meal.


Wednesday, October 8, 2014

Garden Saute


This past summer my garden determined what I cooked. I'd go pick what was ready and brain storm as I did it. Thats how this recipe was born. Its ridiculously easy and you could throw anything in it. Its delicious, too! This recipe has it all. Clean eating and loving every bite of it! You have got to try this!

Now being October and my garden season coming to a close I'll miss my shoot from the hip meals from my garden. But you can always get this produce at your local grocery store so this dish can go year round!

Wanna fork?

Garden Saute

1 Pound ground burger meat (Elk, beef, whatever you have!)
1 Yellow onion, chopped
1 Zuchinni, chopped
1 Yellow squash, chopped
1 Pound green beans
4 Green onions, chopped
2 Tablespoons chopped chives
1 Tablespoon minced garlic
2 Tablespoons butter
1 Teaspoon montreal steak seasoning (Add more as desired.)

Cook your burger meat in steak seasoning. Once cooked set aside and saute your garlic in butter until fragrant. Add veggies and saute until cooked. Once cooked add burger to veggies and stir together allowing to saute for about five minutes or so.

Serve with warm Dinner Bread and enjoy!


Click here to print!


Thursday, October 2, 2014

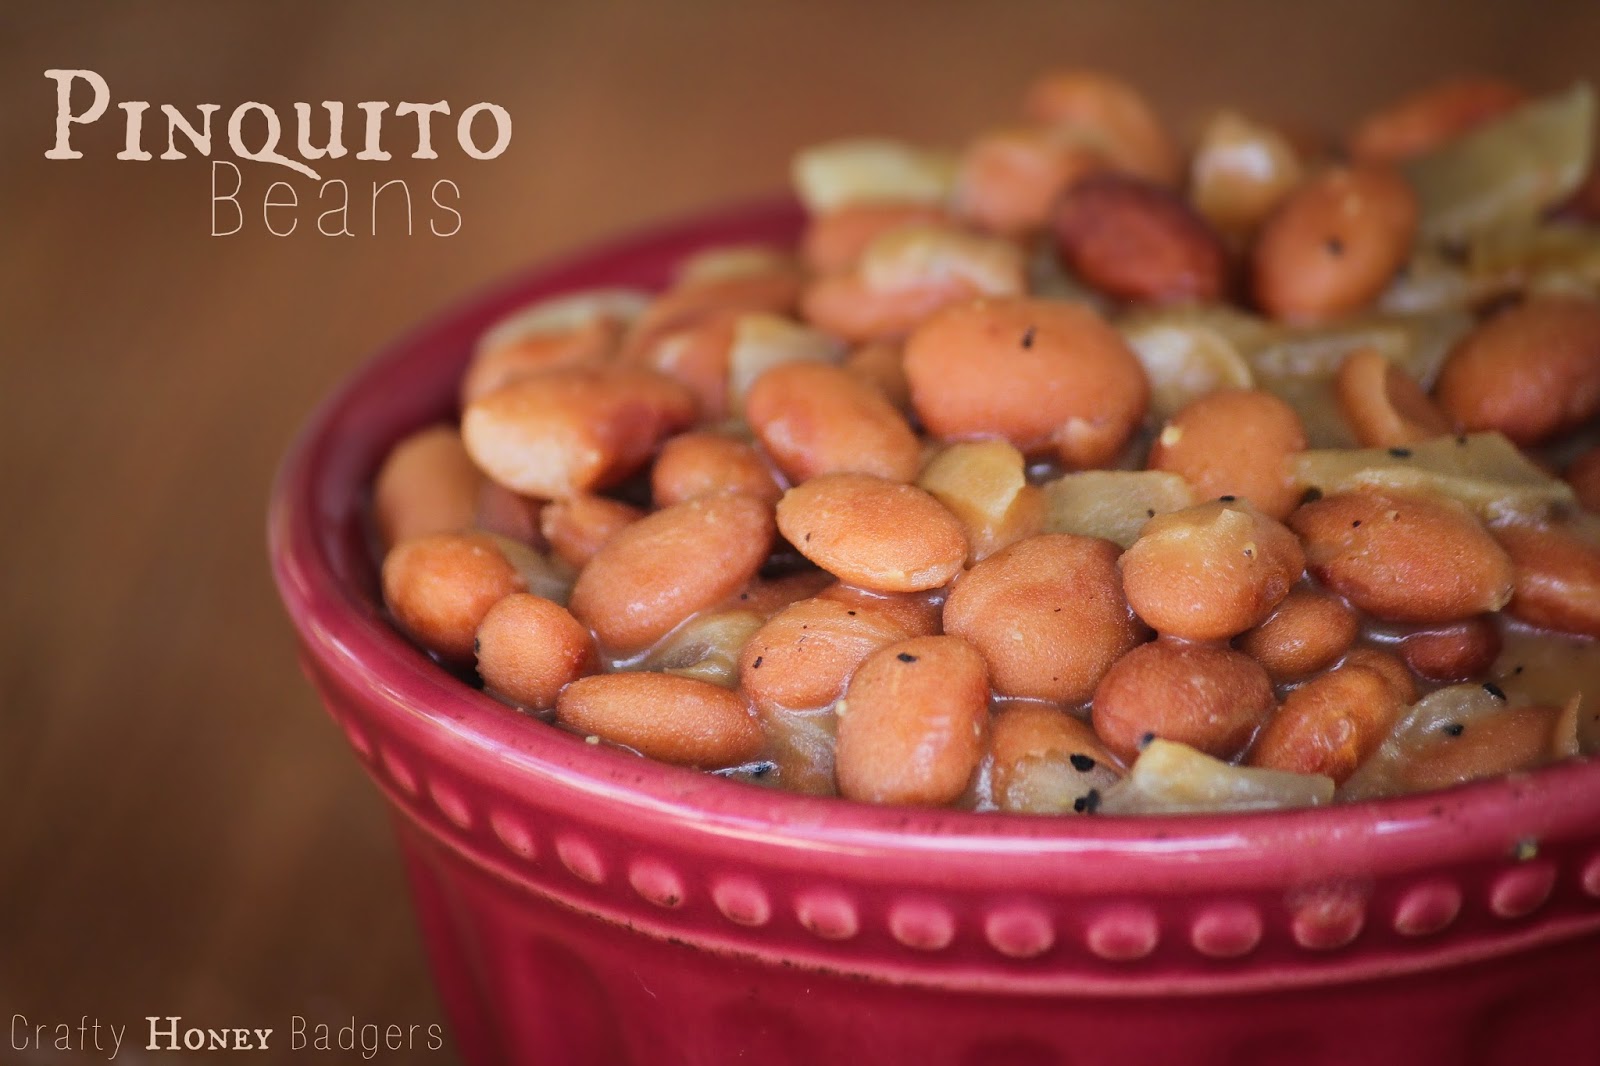
Pinquito Beans


You want an amazing and easy side dish that is great to have for a last minute save? Look no further! This recipe is delicious and I promise its not only because its easy as 1, 2, 3. It packs a bold combination of flavor. I must thank my Mom for this recipe. She always amazes me on what she can whip up in the kitchen in a short order and it still hold bold flavors that linger on your tongue tempting you to have more. 

With fall among us and the temperatures dropping and the air getting a little more crisp. This is a nice warm recipe to come home to. Specially with some corn bread! Give it a try and make bringing dinner to the table a little bit easier while keeping the delicious side!!

Want a spoon?


Pinquito Beans

2 Cans pinto beans --One drained one not
1 Yellow onion chopped
1/2 Teaspoon chili powder
1/2 Teaspoon cumin
1/4 Teaspoon garlic powder
1/4 Teaspoon salt
1 Teaspoon olive oil

Saute onions in a pot in olive oil. Once translucent add beans and spice and allow to simmer all together for 10-15 Minutes. 

Ta Da! Eat alone (I don't judge, I do that!) or serve as a side with a delicious steak or Barbeque'd chicken! 


Friday, September 19, 2014

Mexican Pie

With being an outdoors junkie that I am. There are a lot of late nights getting home from long days on the mountain. Needless to say dinner is frequently a puzzle.  I have been striving to come up with a few recipes to have for emergencies! This is one of them! You could easily have these ingredients in your pantry and fridge. Plus, you could be so creative with it and make it your own. Another one of Mia's famous throw anything in it recipes... Don't you love em?

Crank that oven to 375 and lets do this!


Mexican Pie

1 Large onion diced
4 Hatch chilis chopped and deseeded
2  Cups spanish rice
1/2 Can refried beans
1 pound ground beef or elk or venison. 
4 Large burrito sized flour tortillas
Small can of green chili enchilada sauce.
Taco seasoning
Dash of sea salt
1 1/2 cups shredded cheddar cheese
3 Green onions diced for garnish

Heat your oven to 375. Lightly spray a pie dish with non stick spray.  Saute your onions and chilis until translucent with a dash of salt. Once cooked transfer to plate. Cook your ground meat until done in taco seasonings. Warm up your beans in the microwave. 

Now were ready to build. Pour a little green chili sauce out of the can into the bottom of your pie dish. Layer 2 tortillas on the bottom for your "pie crust." Pour half your beans in bottom. Layer onion chili mixture then rice, meat and 1/2 cup cheese pour a little more green chili sauce. Layer two more tortillas over the top and sprinkle remaining cheese and garnish with green onions. Bake until top is golden and bubbly. 

Slice with pie cutter and serve with Salsa, Guacamole and a dollop of Taco Cream. 

Dinner is served in a short amount of time and tastes delicious! 


Tuesday, July 22, 2014

Grilled Black Bean Quesadillas


 Way back when I lived in Colorado my AC went out and I learned how to cook everything on the grill.  If we couldn't grill it then we didn't eat it. Now the way the grill perfects toasts the tortillas makes this my favorite way to cook these. This is one of those meals you can throw together in minutes and something my kids eat up like they haven't eaten in days. That makes this a double win.


Black bean quesadillas - Fresh style
3 medium tomatoes chopped
1 can home canned black beans, rinsed and drained
1 small onion chopped
2-3 ears of corn, corn cut off the cob
shredded pepper-jack cheese
diced green chilies
cooked chicken or steak in thin slices (optional)
tortillas
1/2 cup salsa
crushed red peppers (optional)

Black bean quesadillas -  lazy super fast style
1 can rotel
1 can black beans, rinsed and drained
1 can corn
shredded pepper-jack cheese
cooked chicken or steak in thin slices (optional)
tortillas
1/2 cup salsa
crushed red peppers (optional)

I'll let you go ahead a guess which version I made.

1. Mix together everything but the cheese and tortillas in a bowl.
2. Lay tortillas out flat on a cold grill.
3. Top entire tortilla with shredded pepper-jack cheese. I actually used shredded cheddar cheese on the ones for the kiddos so it would take the spiciness down a notch.
4. Put tomato, bean and corn mixture in a thick layer on half the tortilla. Sprinkle with red crushed peppers if desired.
5. Light grill and set on low and cook til cheese is melted.
6. Fold in half and serve with homemade sour cream, salsa and avocado.

Friday, July 18, 2014

Chicken Zucchini Alla Pesto!

So last week I boasted with my proud Italian heritage in my Stuffed Crust Garlic Chicken Alfredo Pizza post. How I love the traditional meals such as pasta, pizza, fresh gnocchi, cheese and so on. THIS week I am taking a little bit of a spin on an Italian dish. Instead of angel hair or spaghetti pasta I'm using zucchini! A low carb, delicious and healthy spin. Being guilt free, this dish is abundant in flavor and looks beautiful on a plate. Don't let the clean eating scare you, This dish is for real and absolutely amazing! TO put the cherry on top THIS is a 30 minute meal! Oh yes. This recipe has a lot going for it!!!

My sister who caters for a living, which means, DUH! She's an AMAZING cook, found an awesome gadget called a Veggetti! A spiral slicer that turns zucchini, squash, cucumbers and other vegetables into pasta type strings. Hence the name Veggetti, like spaghetti! Anyways my Mom purchased one and brought it with her when were were all together over the 4th of July at our family cabin. She was making fresh salads using it. I knew at first glimpse I NEEDED one of these. So I promptly purchased one on our way home! Needless to say vegetables have been way more fun since I have had it! Which says a lot, I'm a California girl so I grew up on fresh produce and have always loved it and had fun cooking with it. This gadget opens a whole new direction to take produce though and it makes my mind go crazy with creative ideas!

Chicken Zucchini Alla Pesto is a must try! You'll feel great after eating a fresh healthy meal such as this one and still love every bite of it!

Is that tongue marks on my screen from trying to lick it? NASTY! 

Chicken Zucchini Alla Pesto

For the chicken

4 Chicken breasts. (If their thicker I filet them down to thinner pieces)
1 Tablespoon jarred pesto (Can be found in fresh section of grocery)
2 Tablespoons olive oil
1 Tablespoon vinegar
1/2 Teaspoon salt
1/2 Teaspoon pepper

*Marinate your chicken breasts in this mixture from 30 minutes to 24 hours.*

For the zucchini pasta

4 Medium sized zucchini
1 white onion
2-3 Tablespoons jarred pesto (can be found in fresh section of grocery)
2 Tablespoons butter
1 Teaspoon salt
1 Teaspoon pepper
*Optional* 1/2 Teaspoon minced garlic
Parmesan cheese for garnish! 

Heat a skillet with some melted butter in the bottom or your grill to cook your marinated chicken. Once heated cook until done. Using your Vegetti, slice down your Zucchini. Chop your onions. Heat a skillet to medium high heat and melt butter and optional garlic together. Once melted sauté your onions until caramelized then add your zucchini for a quick sauté. It won't take long. Once all vegetables are cooked add your pesto and spices and stir together. Let simmer for a minute or two then serve with chicken breasts sliced down and served on top.

Bon Appetit!


Thursday, July 10, 2014

Sweet Pepper Grits

This past week Westen the dogs & I went on a little getaway. A much needed one up on the mountains  to our family cabin.  My parents met us up there and we all kicked back from a few days. Away from civilization and only hearing the distant train every morning and night. Breeze in the aspens, tall grass waving around. It was indeed heaven. Days kicked back on the porch playing cards, going on hikes, walking in the evening to the stream to catch some fish or just visiting and going around with jokes makes going to the cabin one of our favorite little getaways. Within a few hours were up in this beautiful place away from everything. We did not go to a parade or see any fireworks on the 4th of July this year.. Instead we had an ice cold beer with delicious food and kicked our feet up away from it all and soaked in the quiet serenity... well not counting the laughing and joking of course... but if we could zip our lip for a minute or two it was quite peaceful. We had our window open right above our bed in the loft and its amazing how well a person can sleep when the natural sounds of the wilderness are singing you a lullaby. Oh how I wish I could sleep that well at home!  To sum it all up you just NEVER want to leave and just stay up there on mountain time.

 Trips to the cabin seem to end up with memories made, laughs shared and above all delicious meals!

Little place I like to call heaven.
I don't know what it is but we have lots of ambition to make delicious meals and try new things! I guess when your miles away from the nearest grocery store your inspired to take what you have and make delicious meals! Thats what we do! My dad whips up the most amazing spiced pancakes, Mom fries the the stream fish we catch in a crunchy savory bite. I usually make a crazy amount of things! Southwestern macaroni salad, Salsa & Guacamole. All time favorites such as those!  So one morning I woke up inspired to do a play on a favorite breakfast side of mine. My dad will frequently cook a batch of grits to go with eggs and bacon. His grits are so good but I though't I'd get a little creative and maybe bring them to a new level of flavor, and I did. This recipe is oh my heck amazing so get yourself this line-up of ingredients and make yourself some!

Did I just face plant my screen in a taking a bite motion? Get it together, Mia! 

Sweet Pepper Grits

1 Batch Albers quick grits cooked grits I follow the 4 servings guideline
2 Medium sized sweet bell peppers. Yellow/Orange mix is what I use
1 Large onion chopped
1 - 1 1/2 cups shredded colby jack cheese
1/2 Teaspoon salt
3 Tablespoons butter (I didn't say it was healthy HA , HA!)
1/2 Teaspoon pepper
1/4 Teaspoon garlic powder
1/4 Teaspoon chili powder

Caramelize your onions & peppers in the butter in a saucepan over medium high heat. Once caramelized add to your pot of cooked grits and stir it in along with all your spices and cheese. Cook until bubbly and cheese melted! Add any extra cheese, or spices if you want more. I use Albers quick grits but really any plan batch of grits can be transformed into this savory mixture!

Serve with some eggs, bacon and toast! Enjoy!


Friday, June 13, 2014

Grilled Steak Salad


Tis the season to be grilling! Fa-la-la-la-LA-la-la-la-LA!

I love to grill! Flavors that the grilling process brings out of food is just something my taste buds can't say no to. You can bet majority of our summer dinners are made on the grill. Sometimes in the winter, too. Oh its snowing? No problem hand me a jacket I'll be fine! With all the wild game in our freezer I'm always getting out packages to defrost, marinade and await their time to hit the grill. Having all the wild game year round leaves me always trying to be creative and come up with a different recipes to try with it other then steak, steak, steak. Not bashing steaks. I could eat them all the time. Putting a twist on just a plain ole steak makes for something new and fresh on the dinner table.

Grilled steak salad is abundant with flavor but yet a light dinner perfect for those hot summer evenings! So get your hands on some steak and lets get crackin'!

I could eat this picture... Literally... No Joke...

Grilled Steak Salad

2 marinated Pounds of steak. I use McCormick Smoking sweet tea marinade
Head of Lettuce *Romain, Iceberg mix is what I use*
1/2 Cup chopped tomato's 
1 Bell pepper chopped
1 onion chopped
1/2 Cup shredded cheese 
 Ranch dressing
Crispy Corn strips
Salt & Pepper

Salad directions

Heat your grill. While heating slice all your veggies and put in a large salad bowl. Grate cheese and sprinkle over the top. Toss ingredients together! Once grill is heated throw your steaks on and cook until desired temperature. I am a medium rare gal so just a quick couple minutes on both sides and set them aside for a little resting period just a couple minutes or so is all they need. Once rested I take the steaks and slice them down into strips. Layer starting with your lettuce/veggie mix and lay desired amount of steak over the top. Sprinkle desired amount of crispy strips and drizzle ranch over everything and enjoy!

Directions for the crispy corn strips

Slice 15 Corn Tortillas into four triangle pieces. Take each triangle and slice down from the edged into skinny strips. Fry in deep fryer or in a pot on the stove at 375. Be very careful with hot oil. Fry until they begin to feel crisp and have a slight golden color using metal tongs take them out and place on a paper towel lined plate. They will brown more as they drain so take them out before they get dark. Sprinkle some sea salt over and boom! Crispy corn strips!

*TIPS*
 For beef eaters I would use a flank/skirt steak cut. For wild game eaters I would use back-strap steak cuts. I usually allow my steaks to marinate for about a day or so. As for cheese I use cheddar or pepper jack but any cheese will work in this recipe. Marinade choice is up to you but the smoking sweet tea marinate is what I have found that fits this salad the best and has the best flavor. McCormick marinade mix's are amazing I use them religiously! I hate bottled ranch dressing, so I recommend using homemade. Even if its made from the powder packets you buy it tastes so much better than the bottle specially if you add some red pepper flakes to your dressing after its made! A vinaigrette works good on this salad as well for a lighter choice! As for crispy strips.. Use lots... lots of crispy strips! Their addicting! 


Tuesday, June 10, 2014

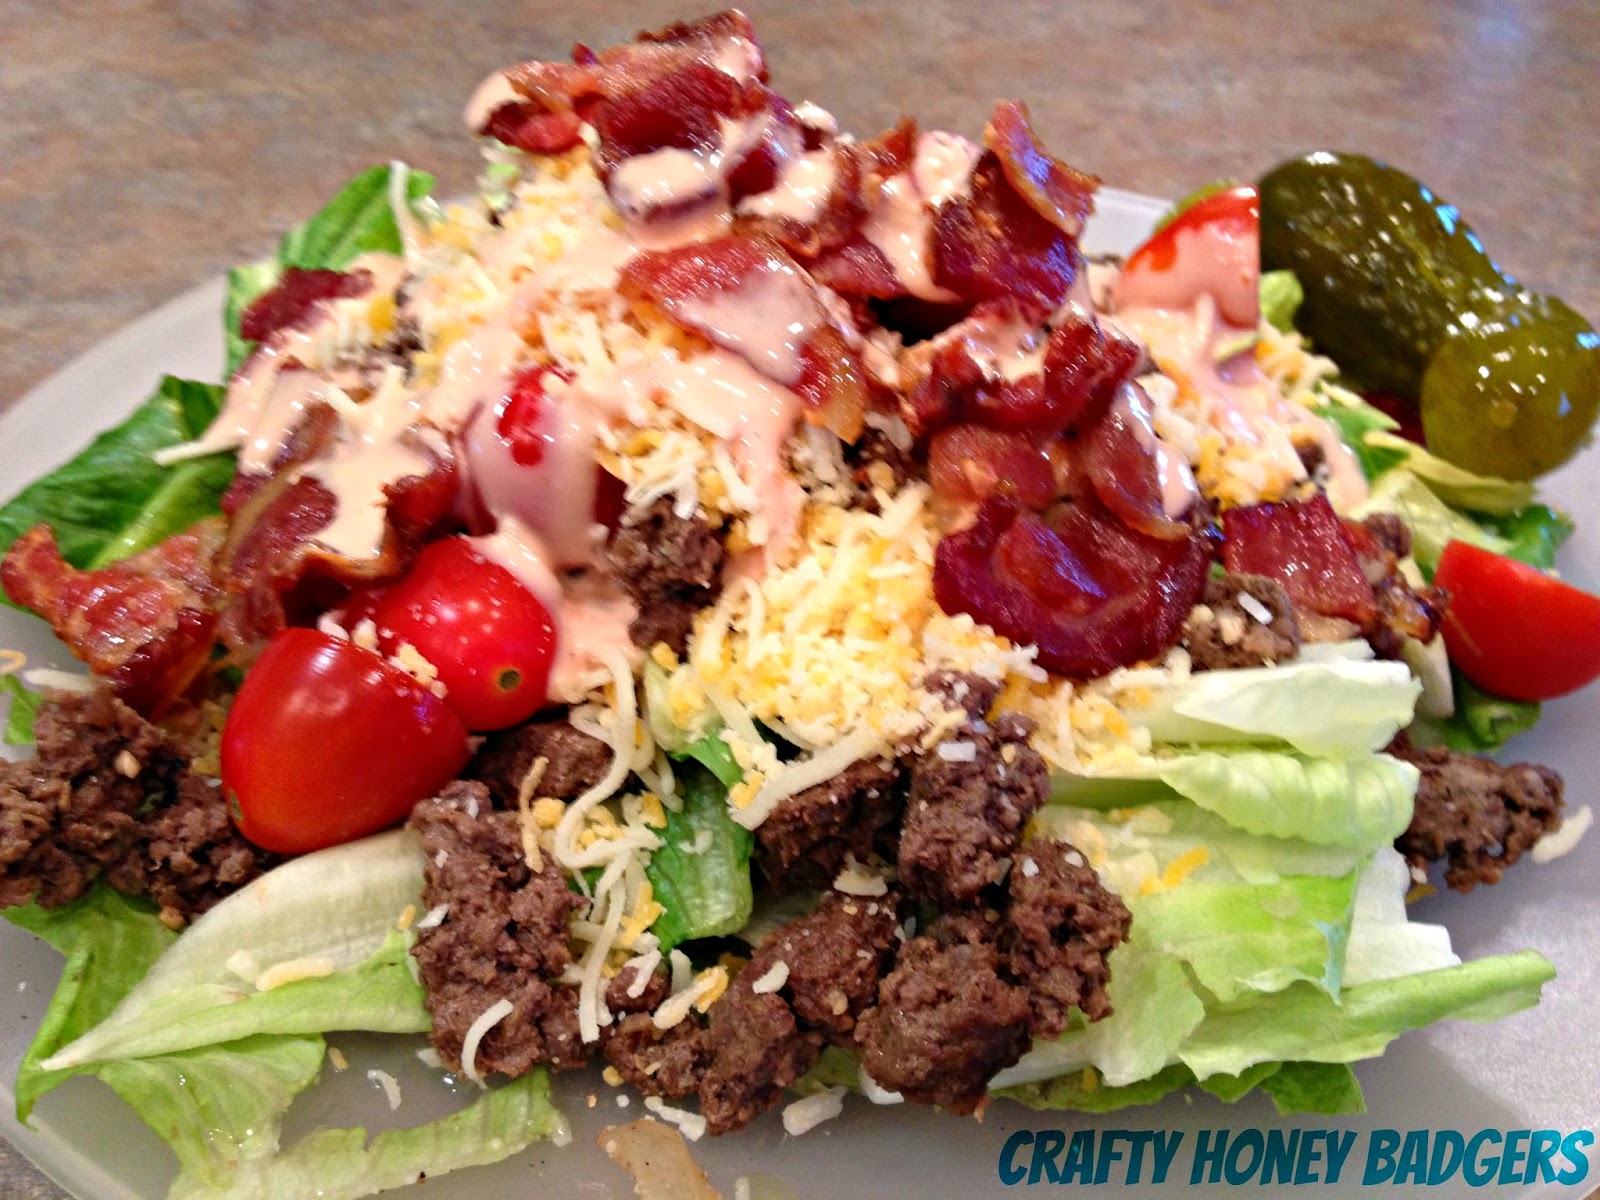
Bacon cheeseburger salad

Call me crazy but I love salads. Side salads, meal salads, potato salad, pasta salad, okay those last two aren't really salad but they sure are yummy.

I know it has the word cheeseburger in it but it also has the word salad in it, so lets focus on that and call it a health food. You're welcome, your summer just got that much awesomer.


This salad is so easy to make too! Easy is my favorite thing to make for dinner, so we have this often.

Brown 1 pound hamburger (shown here with elk hamburger) with 1/2 of a medium onion, chopped, and 1 TBS chili powder.

Then layer lettuce, meat mixture and top with tomatoes, cheese, chopped onion, small pieces of cooked bacon, and homemade thousand island dressing.  Add a pickle and eat.  Yummy yummy salad.  I only wish I had some avocados to put on it.

Now when I say to use thousand island dressing, I mean it! If you use ranch then your just going to have a meaty still good salad but it will NOT be a bacon cheeseburger salad.


Click to print 


Thursday, June 5, 2014

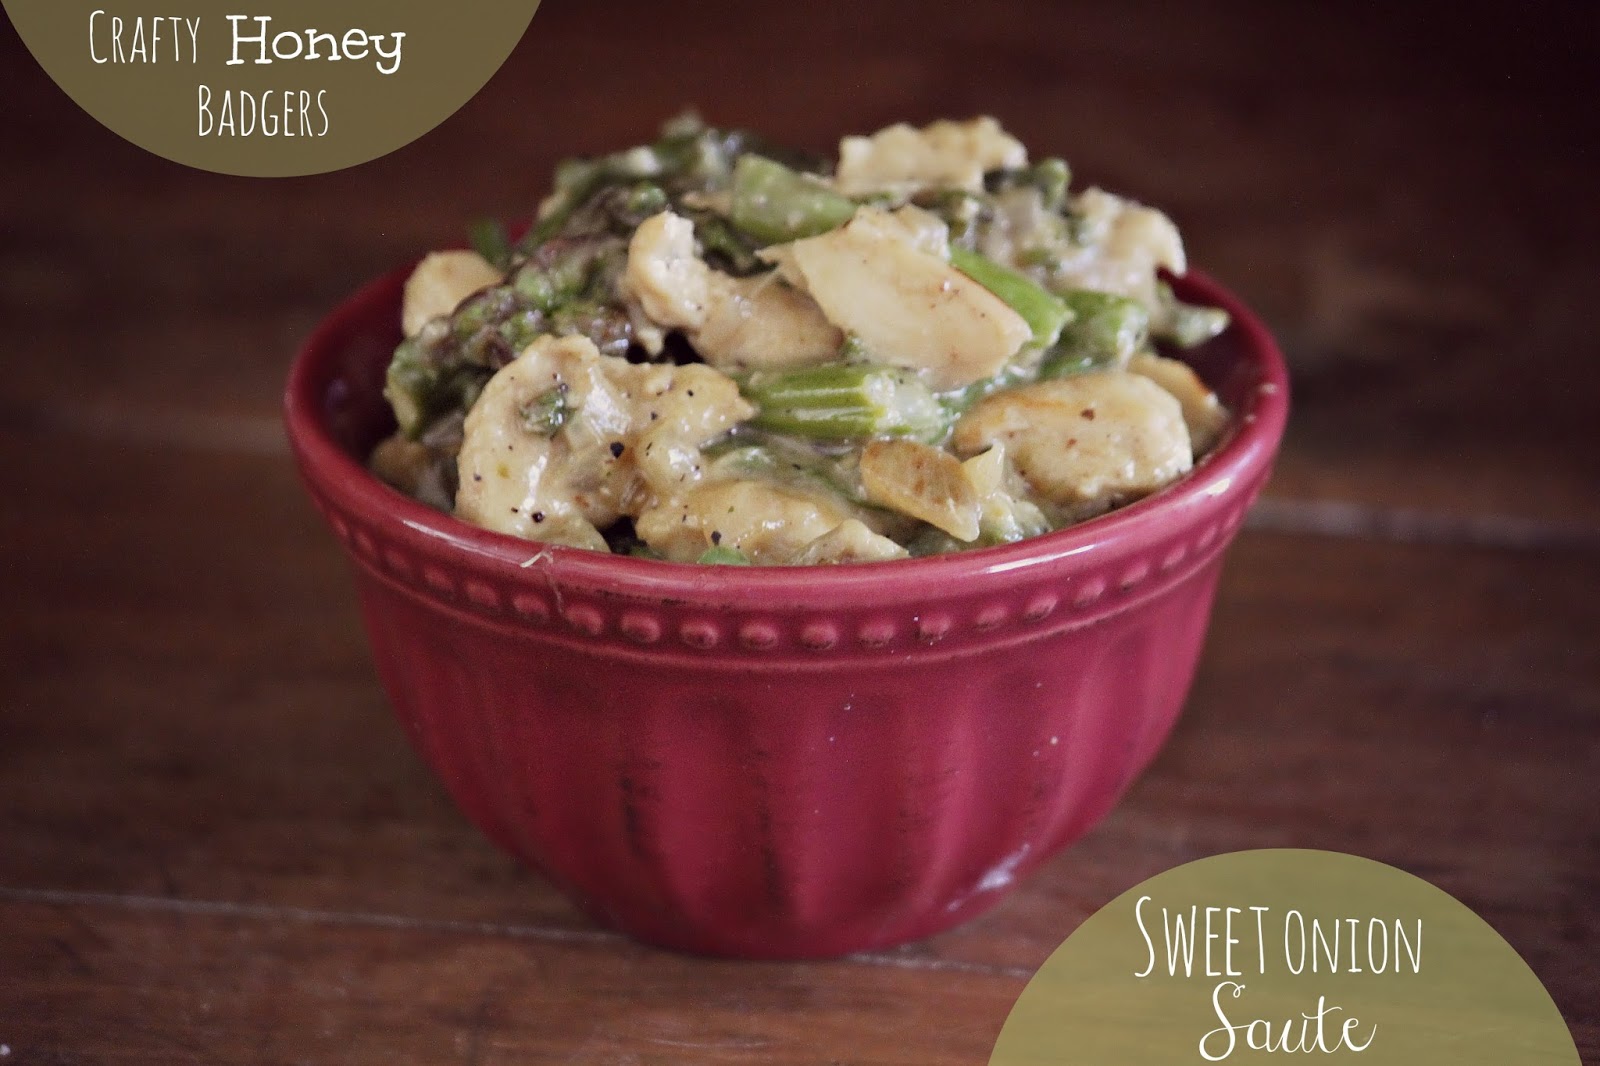
Sweet Onion Saute

Need a quick last minute dinner idea? Need a fast dinner save? Sweet Onion Saute is a quick save for late evenings where we need a quick dinner! Lets not kid ourselves it is hard to beat a meal in under 30 minutes! Rachel Ray has the right idea thats for sure! 30 minute meals are my favorite. Specially with being outdoor junkies my husband & I are usually not getting home until after dark so I'm usually thrashing for a quick dinner idea if I forgot to throw something in the crock pot!

Sweet Onion Saute is a yummy last minute save for getting some grub on the dinner table when were running a little behind! Hope you give it a try and LOVE it! I sure do!

Yummy, Yummy, Yummy!
Sweet Onion Saute

1 Pound chicken breast 
1 Pound asparagus
1  sweet onion
2 Tablespoons butter
1/2 Tablespoon Garlic salt

Chop your onion finely and your asparagus in 1 inch long pieces. Saute in pan over medium high heat. Once onions are caramelized and asparagus tender transfer to plate. Slice your chicken in strips or small chunks (Your Choice) Saute in pan with butter and spices until chicken is cooked with a nice golden look on the outside. Add veggies back into pan with chicken and stir in your onion dressing and let cook for a couple minutes and serve!

TA~DA!! Super chef just whipped out a tasty dinner in a quick amount of time! Boo ya! Pat yourself on the shoulder, now! Enjoy!

CLICK HERE TO PRINT! 
Related Posts Plugin for WordPress, Blogger...