Showing posts with label posts by Mia. Show all posts

Thursday, April 23, 2015

We have a surprise!!!!


You may have noticed a drastic lack of new content around here in 2015.  Sorry not sorry.  It's a giant case of real life has to come before this blog.
And we have been tired, puking, cranky, uncomfortable, busy!


Thursday, December 25, 2014

Merry Christmas!


Merry Christmas!!!!


What a truly magical day. Surrounded by family and friends and just celebrating togetherness! Christmas lights twinkling inside and out. Christmas tree in all its glory. Delicious feast smelling up the home with heavenly scents making everybody hungry. Christmas cookies and treats to cure the seasonal sweet tooth. Seasonal tunes we all know the words to. Presents from loved ones showing caring thoughts. 

All these wonderful things that build up a perfect Christmas. On this day we do need to remember the ones who aren't as blessed. One's who aren't with their loved ones. These are the ones that Christmas needs to bring us together to pray for, think of. Taking our blessings for granted can be all to easy so taking a step back and realizing how blessed we are brings the truth of what Christmas is all about.

So please, Look at what your blessed with. Grab ahold and squeeze onto the ones you love. Cling to cherished holiday memories if the year has you separated from loved ones. Sit down with a hot cup of cider or hot chocolate and think about this truly wonderful holiday that all began with a special little baby boy in a manger. Never forget where it all began.

To sum this all up we just wish you the Merriest of Christmas's! 

As a little Christmas gift here is some favorite holiday tunes! Take a listen, let it play, while you celebrate this great holiday! 

From, Crafty Honey Badgers


Don't like George Strait at all, huh? Ha! 

Once again we wish you a very Merry Christmas!!

Tuesday, December 23, 2014

Christmas Stacked Pot

Merry Christmas EVE, EVE!!!!!!!


Last year while staring at all my put up Christmas decorations. I couldn't help but think of more DIY Christmas cheer! The Christmas stacked pot was created.

While shopping I picked up three plastic planters in size sequence. Red outdoor spray paint. Potting soil. A wooden "Merry Christmas" sign. Some fake Christmas greenery. Couple Christmas solar lights. Some extra trimmings from your Christmas tree, or wreath. 

NO snow for my Colorado Christmas? I need all my un raked leaves covered! haha!

Spray paint your three pots and allow to dry. Fill with potting soil, you don't need to fill completely since you need wiggle room to stack the pot and to fill in with greenery. Take your extra tree trimmings  and fill in the pots. Now the fun part! Add in all your accessories and BAM... A beautiful Christmas stacked pot for your porch! 

You can even add some lights to this pot besides the solar ones. I have found some LED battery pack lights that are really neat. Green wire with red lights to weave through your wreaths or decorations and all needed to turn on is a flick of the switch on your battery pack!  

So here you go. An easy DIY Christmas decoration project you can throw together last minute to impress your Christmas guests!! Get to stackin'! 

Merry Christmas!!!

Thursday, November 20, 2014

Thanksgiving Yarn Tassel Garland

Tis the season to eat TURKEY... Fa La La La La, La La La La! 


Have family coming for Thanksgiving dinner? Feel the home needs a little more of a festive touch? This a great last minute decoration to add an extra seasonal flair to your home on Thanksgiving. Simple but totally cute! 

Gather up a wrap base of your choice, yarn, and scissors and follow the arrows! Lets do this! 


Using a square piece of cardboard or lid to a tupperware wrap yarn of choice around and around until you reach how thick you'd like your tassel. I did 30 wraps. The size of wrap around base can be however short or long you would like your tassels as well. The tupperware lid I used was 4 3/8 long.

Once you have your yarn wrapped around, take about a 3-4 inch piece of yarn and tie a simple knot on top side of wraps as in photo. Take your scissors and cut along the bottom of your wraps turning them loose to look like in the next photo. Cut another 3-4 inch piece of yard and tie your yarn into a tassel shape forming the ball on the top. 

Repeat until you reach desired amount of tassels for your garland. I strung them onto another piece of yarn but anything you have that would form a garland you can use.

There you have it! Simple, quick, and cute seasonal garland.


Thursday, November 13, 2014

Biscuit & Gravy Casserole

What more do I need to say? Its biscuits & gravy.... as a casserole! A comforting breakfast favorite all combined into one dish. Fast, easy and that classic flavor we all love. Give it a try!

Crank your oven to 375 and lets do this!


Biscuit & Gravy Casserole
*This makes a large 13x9 casserole, feel free to half the recipe*

2 Cans flakey biscuits
2 Pounds jimmy dean sausage
4 Cups country gravy (Thick)
1 Onion, chopped
2 Tablespoons minced garlic
1 Tablespoon butter

Pre-heat your oven to 375. Caramelize your onion in butter and garlic, add sausage and cook. Prep 4 cups of country gravy weather its from a packet or homemade from your sausage grease prep right around 4 cups. I prefer my gravy to be thick but of course whatever your preference will work!  Pop your  biscuit cans and cut them into pieces of 4. Layer half your biscuits on the bottom layer of a greased casserole dish. Bake bottom layer of biscuits until they begin to get golden so your bottom layer is cooked. Once brown stir your sausage and onion mixture into gravy. Allow to simmer for a couple minutes. Pour entire mixture over your bottom layer. Take other half of biscuits and layer the rest of them on top of your casserole. 

Bake for 10-15 Minutes or until your biscuits on top get brown.

*Tip* This is an easy recipe. Too much sausage? gravy? no problem... make it work for you. This is the basic layout of how to make a slam dunk breakfast great for feeding family visiting during the holidays!! 


Friday, November 7, 2014

FLASHBACK FRIDAY: Apple Donut Bites!

Here is a flashback to a post you may have missed. Delicious apple donut bites... Perfect for some halloween treats, or a seasonal sweet tooth. Add some pumpkin spice to your batter for a special twist to make it more fitting! 

*******************************

 With summertime among us that brings fair season. A lot of fair food that is oh so sinful but oh so good. Cinnamon rolls, funnel cake, crepes, burgers, fries, nacho's, hot dogs, BBQ, tri-tip sandwiches, deep fried pickles, sweet potato fries, DEEP FRIED ANYTHING! Ugh! Must I say more? 

Anyways apple donut bites is my twist on a fair snack that is so yummy for a summertime treat when your craving your fair style bites. With a greek yogurt batter this recipe is a little different then your normal batter you would make. So give this recipe a try next time you have that crazy craving! 

I did NOT just lick my screen.. I swear... Oh my! 

Apple Donut Bites

4-5 medium sized cooking apples
1 Cup flour
1 Cup Greek Yogurt
1 Egg
1/4 Teaspoon baking powder
1/4 teaspoon salt
3/4 Cup water 
Canola oil for frying
1/2 Cup sugar
1-2 Teaspoons cinnamon

Using an apple slicer slice down your apples you can peel if you wish but its not required. Mix dry batter ingredients. Add egg and yogurt in a separate bowl and whisk until combined. Add to flour and stir. Mixture will be thick and dry because greek yogurt is very thick. Add water until mixture takes on a thicker pasty batter consistency. You may need more than 3/4 cup. Add water and use your judgement. You want a cake like batter!

Heat your oil to 350 degrees either in a skillet or your deep fryer. Once heated grab your sliced apples. They will still be in apple shape so just start pulling off rounds in halves or smaller pieces if you want. Gently dip apple pieces in your batter and lay in the hot oil. Repeat in small batches until apples are gone. The batter will be sticky so it may look like a lot on your apple but thats what puffs up and makes it donut like. Fry for 40 seconds to a minute or so on each side if your skillet frying. For a deep fryer keep an eye on your apple bites until they are golden brown. 1-2 minutes. Once fried drain on a paper towel. 

Mix your sugar and cinnamon and shake over drained apple bites and gently shake around to get a coating all the way around your bites.

Once coated you can sit back and enjoy this delicious sweet bite! 


Thursday, October 30, 2014

Wild Game Crock-Pot BBQ


Oh yes, Another wild game recipe. Lets get real though, any recipe of mine on here that you read that has meat was probably made with wild game unless I specify its beef.

 This recipe is pretty basic and definitely easy. You normally see it just calling for BBQ Sauce over meat and let er' go for 6-8 hours. Which works great for beef or pork that has a nice fat content. Wild game is a very lean meat so therefore drying out can easily occur when not properly cooked. Using some beef broth along with BBQ sauce allows the roasts to cook in moist juices and still get that BBQ flavor we all love! Worried about a thin gravy rather than a thick BBQ glaze? Thats what they made corn starch for.... plus once you shred it all up and add it back it takes up a lot of the excess sauce...

If you don't have any wild game Feel free to use Beef, you can still cook the beef roast in broth and BBQ sauce for an extra juicy roast. This post is to help ones who only have wild game to cook with and successfully direct them to a properly cooked roast!

Great meal to come home to after trick or treating!!!!

OKAY! Enough talking about it... Lets do it! This is a great recipe to leave going all day and come home to a delicious meal waiting for you! Warm, hearty, how can you go wrong?


Wild Game Crock-Pot BBQ

4-5 Pounds of Roast
2 Onions chopped into wedges. 
2-3 Cups beef broth. (Use as much as you would like, depends on how much sauce you want)
2 Cups BBQ Sauce, Your favorite brand. I use Rich & Sassy Famous Daves.
2 Teaspoons Garlic powder

Add all ingredients to a crock pot and allow to cook on low for 6-8 hours. Once cooked take just roasts out and shred them up. If your remaining sauce is thin add some gravy flour, or corn starch... whisk up until consistency you desire and add your meat back to crock pot and stir up. Should be a nice thick glaze like sauce around all the meat. If you want more sauce at this point just adding more BBQ Sauce will work since your meat had already cooked in broth. 

Serve on a roll, over mashes potatoes, or on a plate with a drizzle of BBQ Sauce and some chopped onions, peperoncini peppers, or jalapenos. Treat as you would any BBQ meat!

If you don't have any wild game, feel free to use Beef. You can still cook the beef roast in broth and BBQ sauce for an extra juicy roast. This post is to help ones who only have wild game to cook with and successfully direct them to a properly cooked wild game roast!

Click Here To Print! 

Thursday, October 23, 2014

Short-Rib Slider With Polenta Fries!


Last week I posted two delicious recipes that went GREAT together. So here I go again.. This slider made with left-over short-rib with crunchy polenta fries is the perfect combo AGAIN! One meal turning right into two. Yes! Its amazing, I know! So what you waiting for?

Go to last weeks posts and whip em up to have this amazing set of meals!!


Lets begin! Short-Rib slider with polenta fries! 


Looks delicious, huh? 


Short-Rib Slider

Pretzel slider buns
Chopped/Shredded leftover short ribs
Aged gouda cheese
Horseradish sauce

Slightly toast your bun in a toaster oven. Take out and spread horseradish sauce on both sides. Take bottom bun and pile on the short rib with a few thin slices of cheese. As much as you like. Toast bottom bun with toppings until cheese is bubbly. Toast top bun until desired crunch, just doesn't need to toast as long as the bottom. 


Polenta Fries

Leftover polenta
2-3 Tablespoons of butter (Depending on how many fries you make)
Dash of salt

Your leftover creamy polenta will thicken overnight in the fridge. Being in a casserole dish you can take a slice out and easily cut it down into strip fry shapes. Melt butter in a pan over medium high heat. Saute fries rolling around to all sides and allow to fry until all sides have a crunchy golden consistency. Allow to dab dry on a paper towel.

Serve Slider with fries and ENJOY!


Thursday, October 16, 2014

Braised Garlic Short Ribs.


....PART TWO....
...Recipe for what do drown your polenta in...

Time to complete our hearty delicious meal. Come home from the pumpkin patch to this warm meal that is bound to please. Very fitting for the season an abundant in flavor! Tender short ribs falling off the bone in a rich sauce. Serve over a creamy, cheesy polenta... Ahhh heaven. Pioneer woman inspired this recipe but I had to twist it up a little. 

Have I convinced you yet? You gotta try it! 

STAY TUNED NEXT WEEK FOR SOME LEFTOVER RECIPES FROM THIS MEAL!

I'd hand you a fork if I could...

Braised Garlic Short Ribs
Heat your oven to 350

*FOR THE SHORT RIBS*

8 Short ribs
(You can do a pre soak in wine to help with how tender they get.)
5 Strips of bacon
Montreal steak seasoning
1/2-3/4 Cup flour

Sprinkle steak seasoning over all the short ribs until lightly coated. Roll each rib into some flour until fully coated. In a dutch oven cook your strips of bacon until cooked. Remove to a plate leaving grease in pot. Brown your short ribs in grease. Not more than 25-30 seconds on each side. Remove them to a plate.

*FOR THE JUICE*

1 Yellow onion, diced
2-3 Carrots, diced small
2 Tablespoons minced garlic
2 Tablespoons Olive oil
2 Cups beef broth
2 Cups wine (Dry not sweet variety.)
1/4 Cup balsamic vinegar
Dash of salt & pepper 
Sprig of rosemary 

After taking out ribs use same pot and saute your veggies & garlic in leftover grease and olive oil. Allow to become slightly caramelized.  Add wine and allow to boil for a few minutes along with veggie mixture. Use a whisk and scrape all the good stuff from the bottom of the pot for extra flavor. Now add broth and allow to simmer together for about 5-10 minutes. Add salt & pepper and your cooked bacon from earlier. Using tongs place your ribs into the HEAVENLY mixture in your pot. Make sure they are completely submerged. Add your sprig of rosemary to the top and cover with dutch oven lid and bake in oven for 2-3 hours. 

After 2-3 hours take pot out of the oven and let sit for about 20-30 minutes. After that remove the lid and allow the heavenly aroma to fill your kitchen. At this point you will have no choice but to eat it because... well.... how can you not? Enjoy!

Serve over Creamy MICROWAVE POLENTA for a delicious combination!


Wednesday, October 15, 2014

Creamy MICROWAVE Polenta


....PART ONE TO A DELICIOUS MEAL....
...Part Two Tomorrow...

These cold fall days have had me in the mood for a warm hearty meal. With some family raised beef in the freezer, short ribs seemed fitting for the mood I have been in. Anyways when I think short ribs I think soft polenta to serve it on. I grew up eating polenta in my Swiss family, Even included it on the menu at my own wedding. Its a delicious and inexpensive but above all CLASSY side dish. Years ago in Switzerland it was considered peasant food because its JUST corn meal and water. Thats it. There is so much you can add to it to make it a jazzy amazing dish. 

Here is a quick easy way to whip up some polenta in your home in short order.

Want a spoon? fork? you hands? Go for it! Don't blame you!! 

Creamy Microwave Polenta
2 Cups cornmeal
7  Cups water
1 Tablespoon olive oil
2 Teaspoons salt
4 Tablespoons butter
1/2-3/4 Cups shredded cheese (Any kind your prefer, parmesan, cheddar, jack, gouda)

Combine all ingredients except for butter and cheese in a large glass or stoneware dish that leaves enough space for water to bubble up without overflowing. Cover tightly with saran wrap and microwave on high for 14 minutes.
Carefully uncover dish and stir your mixture. Should still be watery but beginning to thicken. Add a splash more water if your mixture is clumpy or stiff. After stirring re-cover and microwave on high for another 12-14 minutes.

Again, carefully uncover and stir. Polenta should be thickened but not stiff. Add butter and cheese and stir in. Taste and add anything more of anything that you desire.

Serve as a side dish or under PART TWO to this amazing meal.


Wednesday, October 8, 2014

Garden Saute


This past summer my garden determined what I cooked. I'd go pick what was ready and brain storm as I did it. Thats how this recipe was born. Its ridiculously easy and you could throw anything in it. Its delicious, too! This recipe has it all. Clean eating and loving every bite of it! You have got to try this!

Now being October and my garden season coming to a close I'll miss my shoot from the hip meals from my garden. But you can always get this produce at your local grocery store so this dish can go year round!

Wanna fork?

Garden Saute

1 Pound ground burger meat (Elk, beef, whatever you have!)
1 Yellow onion, chopped
1 Zuchinni, chopped
1 Yellow squash, chopped
1 Pound green beans
4 Green onions, chopped
2 Tablespoons chopped chives
1 Tablespoon minced garlic
2 Tablespoons butter
1 Teaspoon montreal steak seasoning (Add more as desired.)

Cook your burger meat in steak seasoning. Once cooked set aside and saute your garlic in butter until fragrant. Add veggies and saute until cooked. Once cooked add burger to veggies and stir together allowing to saute for about five minutes or so.

Serve with warm Dinner Bread and enjoy!


Click here to print!


Friday, October 3, 2014

Flashback Friday: Southwestern Macaroni Salad


Happy Flashback friday everybody, and apparently Fourth Of July, too! Rewind back with us and enjoy this old post with a delicious recipe!!!


HAPPY FOURTH OF JULY!!

 Best wishes for a safe and fun holiday full of memories to you all from Crafty Honey Badgers! 

Isn't this holiday the greatest? Well every holiday is great in its own way, but independence day is different! You feel a pride to be an American and thankful for all the brave men and woman who have fought to keep it AMERICA! Plus, a hot summer day on the lake ended with some fireworks is pretty hard to beat!

Kids playing with anticipation for the firecrackers when night fall covers. Family gathering and catching up around a BBQ. People wearing red, white and blue with lots of cheer. Parades bringing communities together to celebrate our freedom. This holiday brings us all as one together to be proud of this great country we live in! For one day we all can agree on one thing and thats what a beautiful country we live in and how we are blessed in so many ways. Holidays seem to have that effect on people and thats what I love about them. Opinions separate us quite often but holidays bring a spirit from deep down in us that makes us look one another eye to eye. As a country we can wave our flags and rejoice in cheer for old glory. Our beautiful country the United States Of America.

So I say it again, we wish you all a cheerful, sunny fourth of July. May the fireworks shoot high and light up the sky above you and fill you with cheer! Whether your on the mountain staring at the stars, or down on the streets of your hometown celebrating with your community we wish you a blessed day!

Anyways what's a holiday without a great recipe? Heres a last minute save for a delicious side dish for any of you who may be running behind today! Fourth of July or not, This recipe is a great all american side dish with a twist that will please any hungry appetite! 


Grab a spoon and crack your screen, you know you wanna!

Southwestern Macaroni Salad

1 Pound macaroni or ditalini pasta (Pictured is ditalini)
5 large pieces of roasted red peppers. (I use jar kind from condiment isle)
4 Green onions
1/2 Cup mayo
1/4 cup milk
2 Teaspoons sugar
1 Teaspoon chili powder
1/4 Teaspoon salt
LOTS of black pepper

Boil your pasta on medium high heat until al dente. Drain and rinse with cold water until pasta has cooled off. Pour pasta in large salad bowl.  Chop your peppers and onions and stir into pasta. Whisk your milk, mayo and spices together and pour over pasta mixture. Stir until everything has combined and that heavenly dressing has touched EVERY piece of pasta!

Serve with your favorite summertime meals and enjoy! Or just eat a bowlful by itself.. Been there, done that! 

Have a GREAT fourth of July everybody!


Thursday, October 2, 2014

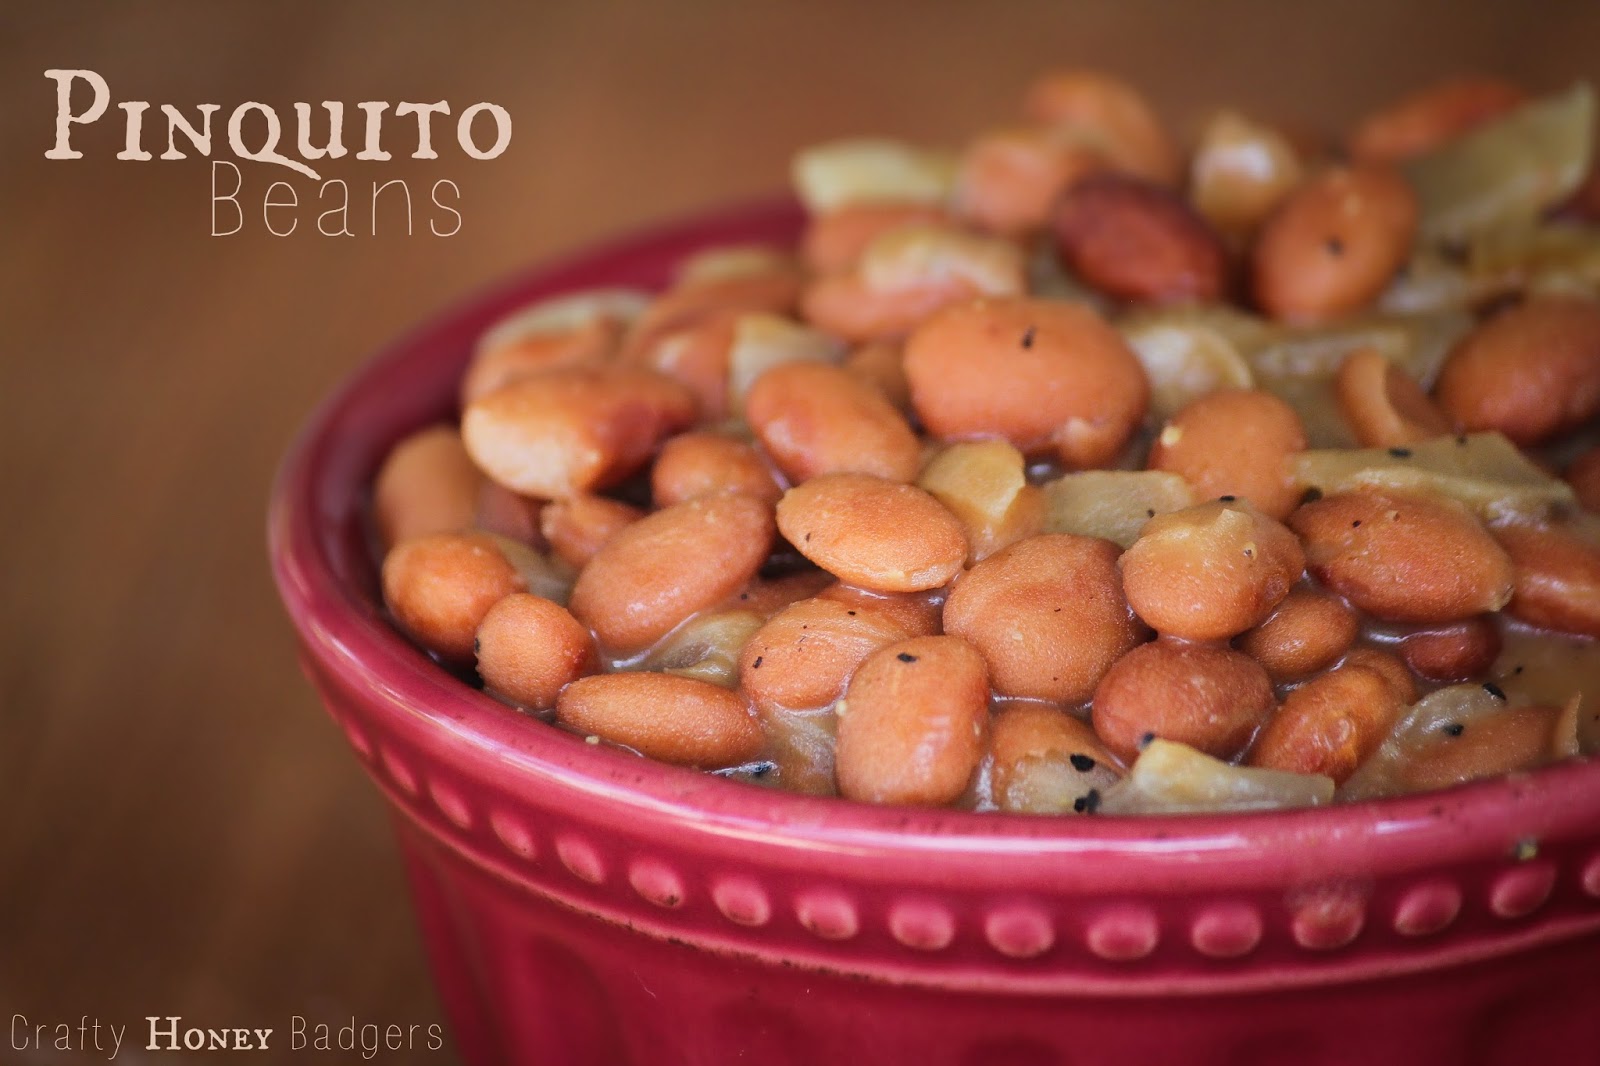
Pinquito Beans


You want an amazing and easy side dish that is great to have for a last minute save? Look no further! This recipe is delicious and I promise its not only because its easy as 1, 2, 3. It packs a bold combination of flavor. I must thank my Mom for this recipe. She always amazes me on what she can whip up in the kitchen in a short order and it still hold bold flavors that linger on your tongue tempting you to have more. 

With fall among us and the temperatures dropping and the air getting a little more crisp. This is a nice warm recipe to come home to. Specially with some corn bread! Give it a try and make bringing dinner to the table a little bit easier while keeping the delicious side!!

Want a spoon?


Pinquito Beans

2 Cans pinto beans --One drained one not
1 Yellow onion chopped
1/2 Teaspoon chili powder
1/2 Teaspoon cumin
1/4 Teaspoon garlic powder
1/4 Teaspoon salt
1 Teaspoon olive oil

Saute onions in a pot in olive oil. Once translucent add beans and spice and allow to simmer all together for 10-15 Minutes. 

Ta Da! Eat alone (I don't judge, I do that!) or serve as a side with a delicious steak or Barbeque'd chicken! 


Thursday, September 25, 2014

Dinner Bread


Leave it to me to come up with a special way to jazz up the basket of bread on the table. Not like warm rolls or sour dough isn't amazing enough, right? WELL I have made a big mistake. Butter, cheese, green onions, ON BREAD.... Yikes. My sincere apologies in advance, but you gotta try this!


I'm sorry your fingers can't go through the screen to grab a piece. 

Dinner Bread

*This is a pizza dough recipe from my Stuffed Crust Chicken Alfredo Pizza*

This dough recipe makes 2 pizza doughs. Use one freeze the other!

3 Cups flour extra (have an extra half cup for dusting and so on)

1 package instant dry yeast sugar

2 Teaspoon salt

1 Teaspoon sugar

1 1/2 Cup HOT water

1/2 Teaspoon olive oil

Mix all these ingredients together and knead. Cut into 2 equal balls and allow to rise in a olive oil lined bowl under a tea cloth for about 2-3 hours. If you do not intend to use both dough balls no need to rise what you won't use. Wrap tightly in saran wrap and stick in freezer.

 Once your dough has risen roll out on flowered surface into long and wide rectangle shape to fit on a cookie sheet. Dough will roll out a little thinner. Allow to rise for 15-20 minutes under a tea cloth in cookie sheet. 

Topping

3-4 Tablespoons butter, melted 
1/3-1/2 Cups parmesan cheese (Depending on your cheese preference)
1/2 Cup chopped green onions
1 Tablespoon italian seasoning
1/4 Teaspoon garlic powder
Sprinkle of chopped chives on top (Optional)

Heat your oven to 375 degrees. Pour melted butter on to raw rolled out dough. Cover entire dough surface even over "crust" area so your edges brown a little. Sprinkle parm, then green onions, spices and optional chives over the top. Bake for 10 minutes or until golden brown. 

Cut into squares for serving and enjoy along with a delicious dinner or as an appetizer, or with just a glass of wine. Been there done that and no complaints with that combo. 


Friday, September 19, 2014

Mexican Pie

With being an outdoors junkie that I am. There are a lot of late nights getting home from long days on the mountain. Needless to say dinner is frequently a puzzle.  I have been striving to come up with a few recipes to have for emergencies! This is one of them! You could easily have these ingredients in your pantry and fridge. Plus, you could be so creative with it and make it your own. Another one of Mia's famous throw anything in it recipes... Don't you love em?

Crank that oven to 375 and lets do this!


Mexican Pie

1 Large onion diced
4 Hatch chilis chopped and deseeded
2  Cups spanish rice
1/2 Can refried beans
1 pound ground beef or elk or venison. 
4 Large burrito sized flour tortillas
Small can of green chili enchilada sauce.
Taco seasoning
Dash of sea salt
1 1/2 cups shredded cheddar cheese
3 Green onions diced for garnish

Heat your oven to 375. Lightly spray a pie dish with non stick spray.  Saute your onions and chilis until translucent with a dash of salt. Once cooked transfer to plate. Cook your ground meat until done in taco seasonings. Warm up your beans in the microwave. 

Now were ready to build. Pour a little green chili sauce out of the can into the bottom of your pie dish. Layer 2 tortillas on the bottom for your "pie crust." Pour half your beans in bottom. Layer onion chili mixture then rice, meat and 1/2 cup cheese pour a little more green chili sauce. Layer two more tortillas over the top and sprinkle remaining cheese and garnish with green onions. Bake until top is golden and bubbly. 

Slice with pie cutter and serve with Salsa, Guacamole and a dollop of Taco Cream. 

Dinner is served in a short amount of time and tastes delicious! 


Thursday, September 18, 2014

Taco Cream

So Mexican food is amazing as we all know. Well I hope we all know. If not you really need to try it, or if you don't like it you should try it again! ANYWAYS... With lots of elk meat in the freezer and some pork and chicken as well I find myself making taco's, enchiladas, carnitas, taco salad, fajitas, loaded nachos and all sorts of Mexican food quite frequently! Always have some Salsa & Guacamole in the fridge.

One thing with Mexican food that I have been thinking hard on is bringing sour cream to a new level. I buy sour cream in bulk. I love it on everything and could literally just eat it with a spoon. No doubt guacamole salsa and just PLAIN sour cream is fantastic but being the creative cook I am, I always am thinking of ways to twist a condiment to boost it to a delicious new taste. As simple as this little recipe may be the flavor it holds is amazing. You can put it on any Mexican dish you prepare. Dipping chips in it is even knock you silly delicious. 

I hope you give it a try and bring your Mexican meal to a whole new level with a simple topping! 

Do a dollop of TACO CREAM! 

Taco Cream

1 Cup sour cream
1 1/2 Tablespoons lemon juice
1 Teaspoon taco seasoning
1/4 Teaspoon salt

In a small bowl combine all these ingredients and whisk together until combined. Add more spice if you desire and start putting a spooning it on everything!! 


Friday, August 1, 2014

Elk Tenderloin With Whiskey Cream Sauce

 When I fill my tag on a beautiful elk one of the first thoughts that crosses my mind amongst many others is, "I CANT WAIT TO COOK THE TENDERLOIN!" Such a delicious piece of meat and a perfect way to celebrate a successful hunt and getting meat in the freezer to feed your family. 

I hunt for lots of reasons. Tradition, passion, perseverance, feeding my adventurous side. Its my happy place to be in the woods and the memories made out there during hunting season are irreplaceable. Even during non hunting seasons. Above all though I hunt to feed my family. Its an empowering feeling to know you have put meat in the freezer to prepare for your loved ones for the coming year. I appreciate all the hard work that goes into it as well. Rather than grabbing something wrapped in plastic out of a grocery store, I go out in whatever weather conditions that are handed to me and ethically hunt an animal to harvest. The hunt of the animal can lead you into some far places and the attempts and fails just fuel your fire to wake up the next morning and try again but once you have succeeded its is glorious. Approaching the animal you harvested with much anticipation and excitement. Once eyes are laid upon your trophy the celebrating and hugging with high fives and hollering begins. Sometimes tears of happiness. Your hunt has been a true success and your hard work has paid off. Doesn't mean your hard work is over though, after some pictures to keep for treasuring the memories made it becomes all about the meat.  Although the hunt may have been targeting what the animal has on its head to measure its trophy quality when you have succeeded and harvested the animal the meat is top priority. Horns last forever, wild game meat requires lots of care. It truly becomes a labor of love. You sometimes work long into the night packing out your trophy and its meat on your back to get it home. Even once you've pushed your muscles to the limits packing out a heavy load numerous of times on your back the work isn't over. Once home you break the meat down and process the meat into steaks, roasts etc. Then wrap it all up in little packages and put in the freezer. The whole process is hard work but it leaves you empowered. Conserving the wildlife for the benefit of the land and providing to my family after conquering yet another hunt. Specially after a hard hunt, it is emotional every time I fill my tag because I feel truly blessed that luck played in my favor so I could provide to my family but when a hunt has been hard and trying with lots of miles hiked the feeling of success is overwhelming. After explaining all of this  I'm sure its obvious how special and important this all is to me. Its not just a hunt, its not just about the horns, its about more than just those examples even though they play a part. Its a well rounded process for me and for reasons like that make me love hunting so much. Its in my blood.

To make a long story short this recipe does this piece of meat pure justice without fussing to much with the meat itself. The whiskey sauce compliments its perfectly as well. This recipe is a keeper and absolutely delicious! Even for non-hunters this recipe follows suit with beef tenderloin and will go great with the sauce as well! I hope you have enjoyed understanding how special meals like this are to my family and all the steps it takes to get to this wonderful meal around the table!

Grab your knife, grab your fork!

Elk Tenderloin With Whiskey Cream Sauce

For the meat

1 Elk tenderloin
Montreal steak seasoning
Garlic salt
Olive oil

For the sauce

1 Onion chopped
8 Tablespoons of butter
1 Cup whiskey
1 Cup beef broth
1/2 Cup heavy whipping cream
1/4 Teaspoon garlic powder
Dash of salt n pepper

*Thicken with a dash of gravy flour if needed.*

Take your tenderloin and drizzle with a little olive oil. Spice the meat with all the spices to your liking. Doesn't take much just sprinkle to lightly coat the meat. Allow to sit and become close to room temp marinating in extra juices and spices on a dish.

Caramelize your onions in a pan over medium high heat with the butter. Once onions are translucent turn down heat and slowly stir in your whiskey. Allow to simmer until half of mixture evaporates and strong whiskey smell subsides. Once that has happened stir in the beef broth and allow to simmer and thicken. Stir in heavy whipping cream allowing it to continue to bubble. Sprinkle some salt n pepper and let sauce simmer and continue to thicken. If sauce seems to still be a little loose add some gravy flower quickly whisking it in. 

Heat your grill to a a medium heat for grilling meat. Once heated start to grill your meat. Allow 5-8 minutes on each side depending on size. Spoon on extra spices and olive oil from the bottom of the dish during the cooking process for extra flavor. Remember to take your meat off a little early since it will continue to cook as it sits. Let it sit as a whole piece for about 5 minutes before slicing down.

Cut against the grain and serve with whiskey sauce drizzled over the top! Enjoy with a beer or cocktail and some heavenly side dishes!

Bon Appetit and live, laugh, love and HUNT!


Thursday, July 31, 2014

Chicken Wrapped Asparagus

So our family eats quite rustic on a regular basis. A spin off of a fancy meal is not seen on our dinner table much! With that being said the other day I randomly had chicken breasts defrosted AND asparagus.. Instead of just grilling em up I said why not try and combine them into one? Wrap it up! I must say I cook a lot and love all that I produce but I rarely feel as proud as I did with this dish. I was intimidated with just the thought of making it so making it and having it be a success and taste delicious left me feeling quite proud! I get a lot of my inspiration from watching food network and cook channel. It may be the worst thing for me but I usually watch a cooking show while I do my workout. Talk about cussing all food while doing burpees. Nevertheless I enjoy challenging my creativity with inspiration from those shows and this recipe is a perfect example!

Cook up this recipe and have a glass of wine. Get a little classy. Or just cook it up, have a beer and watch Duck Dynasty thats totally cool, too! I'd lean more towards the second of the two!

The cream sauce compliments this dish perfectly.
Chicken Wrapped Asparagus 

6 Chicken Breasts
1 Pound of asparagus with ends trimmed off
2 Tablespoons butter
Poultry seasoning

*Some saran wrap and butchers string and a meat mallet, if you don't have a meat mallet use the bottom side of a fry pan*

For the sauce

8 Oz. Cream cheese
1/2 Cup Parmesan cheese
1/3 Cup milk
3 Tablespoons butter
1/4 Teaspoon garlic powder
Salt n Pepper

Preheat your oven to 375 degrees. Lay your chicken breasts on a cutting board. Lay a single layer of saran wrap over them all and using a meat mallet beat your chicken into large round thin pieces for ease of wrapping. Once beaten sprinkle poultry seasoning over both sides. Take your asparagus and saute to par cook them making the main cooking process quicker. Once cooked spread out the pound evenly laying pieces of the asparagus over one end of the chicken. 

Pre cut your butcher string into as many pieces as you need for ease. You can do a butchers knot or 2 strings a piece. Tie a knot on each end to hold the chicken together. Very easy! Roll your chicken around asparagus and continue to roll until completely rolled up. Tie your two strings and your done! Continue until pieces are gone.

Saute chicken in butter to brown your outside a little before baking process. Once browned lay in an olive oil drizzled baking pan and bake for about 8-10 minutes. Watch closely so your chicken doesn't dry out.

For the sauce

Melt butter and cream cheese in a saucepan. Whisk in Parm until combined. Slowly pour in milk, sprinkle spices and whisk everything together until bubbly.

CUT OFF YOUR STRINGS and Serve chicken with a drizzle of sauce on top and enjoy!

Click Here To Print!


Friday, July 25, 2014

Moonstruck Breakfast


I grew up a swiss italian. In a family that was proud of it! Needless to say from music to movies there were some italian themes that were favorites. One of my Mom's favorite movies is Moonstruck. Click HERE to watch a trailer if your not familiar. We find ourselves quoting this movie quite often. Our favorite being, "SNAP OUT OF IT!" This movie revolves around family and the crazy things that sometimes happen. The plot builds up to a hilarious way it ends that leaves you wanting more! The dialog, food, and music just brings this movie together into a favorite. This movie is a romantic whirlwind full of laughs. 

Anyways there is a scene in the beginning of the movie where the mother, Rose is cooking breakfast and its this recipe right here. WATCH THE SCENE HERE. Red peppers over a egg in the hole! Simple but so delicious! Letting the bread toast to a golden crunch in melted butter. This is a heavenly breakfast I cook quite often and every time I do I can't help but think of this movie!

Weather you know the movie or not this recipe is a slam dunk for a delicious breakfast!

When the moon hits your eye like a BIG pizza pie thats ammmmmmore!

Moonstruck Breakfast

1 slice bread. (I recommend sour dough or english muffin BREAD)
1 egg
1/4 of a red bell pepper sliced into strips
2 tablespoons butter
dash of salt & pepper

Saute your red peppers in butter until caramelized and tender. Using a knife or small  round cookie cutter cut a hole in the middle of your slice of bread. Using leftover melted butter in pan or adding some more take your piece of bread and coat both sides in a little butter. Lay one side down and crack your egg right into the hole. Cook on one side until egg cooks up from the bottom a little. Flip and cook until finished on the other side. 

Serve with peppers over the top and enjoy!

Bon Appetit! 

Related Posts Plugin for WordPress, Blogger...