Friday, October 31, 2014

Girl Scouts Fall/Halloween Party


Girl Scout parties are always fun and super fast paced.  You need a lot of activities to keep everyone busy.

Ghost Bowling! Everyone had lots and lots of fun with this! I just cut some black construction paper for the eyes and mouth and hot glued it on.


Girl Scout Law, 10 lines, 10 different colors, 10 toes.  Coincidence? I think not!


 We played Halloween/Fall charades and ate lots of yummy snacks. Everyone had fun and the party was a success!

Thursday, October 30, 2014

Wild Game Crock-Pot BBQ


Oh yes, Another wild game recipe. Lets get real though, any recipe of mine on here that you read that has meat was probably made with wild game unless I specify its beef.

 This recipe is pretty basic and definitely easy. You normally see it just calling for BBQ Sauce over meat and let er' go for 6-8 hours. Which works great for beef or pork that has a nice fat content. Wild game is a very lean meat so therefore drying out can easily occur when not properly cooked. Using some beef broth along with BBQ sauce allows the roasts to cook in moist juices and still get that BBQ flavor we all love! Worried about a thin gravy rather than a thick BBQ glaze? Thats what they made corn starch for.... plus once you shred it all up and add it back it takes up a lot of the excess sauce...

If you don't have any wild game Feel free to use Beef, you can still cook the beef roast in broth and BBQ sauce for an extra juicy roast. This post is to help ones who only have wild game to cook with and successfully direct them to a properly cooked roast!

Great meal to come home to after trick or treating!!!!

OKAY! Enough talking about it... Lets do it! This is a great recipe to leave going all day and come home to a delicious meal waiting for you! Warm, hearty, how can you go wrong?


Wild Game Crock-Pot BBQ

4-5 Pounds of Roast
2 Onions chopped into wedges. 
2-3 Cups beef broth. (Use as much as you would like, depends on how much sauce you want)
2 Cups BBQ Sauce, Your favorite brand. I use Rich & Sassy Famous Daves.
2 Teaspoons Garlic powder

Add all ingredients to a crock pot and allow to cook on low for 6-8 hours. Once cooked take just roasts out and shred them up. If your remaining sauce is thin add some gravy flour, or corn starch... whisk up until consistency you desire and add your meat back to crock pot and stir up. Should be a nice thick glaze like sauce around all the meat. If you want more sauce at this point just adding more BBQ Sauce will work since your meat had already cooked in broth. 

Serve on a roll, over mashes potatoes, or on a plate with a drizzle of BBQ Sauce and some chopped onions, peperoncini peppers, or jalapenos. Treat as you would any BBQ meat!

If you don't have any wild game, feel free to use Beef. You can still cook the beef roast in broth and BBQ sauce for an extra juicy roast. This post is to help ones who only have wild game to cook with and successfully direct them to a properly cooked wild game roast!

Click Here To Print! 

Tuesday, October 28, 2014

Pumpkin Smoothie

We have started a new family tradition! Pumpkin smoothie while carving pumpkins.  
Best. Idea. Ever. 
I didn't have all the ingredients for any of the recipes I looked at, so I winged it.  I'm good at winging it, I have a habit of trying things out without even reading the tutorial.  It gets me into trouble every now and then again, but no hospitalizations to date, and so my bad habit continues.

1 cup vanilla Greek yogurt
1 tablespoon vanilla
1 cup pumpkin (not pumpkin pie filling, I had canned pumpkin chunks a year ago and used that)
2 tablespoons sugar
1/4 teaspoon nutmeg
1/2  teaspoon cinnamon
1/2 cup milk
1/2 to 1 cup ice as desired
Whipped cream for topping

Blend it all up, top with whipped cream, and drink it down. Delish!


I'm pretty sure is more like a every other day kind of tradition rather than a once a year while carving pumpkins kind of deal.

Thursday, October 23, 2014

Short-Rib Slider With Polenta Fries!


Last week I posted two delicious recipes that went GREAT together. So here I go again.. This slider made with left-over short-rib with crunchy polenta fries is the perfect combo AGAIN! One meal turning right into two. Yes! Its amazing, I know! So what you waiting for?

Go to last weeks posts and whip em up to have this amazing set of meals!!


Lets begin! Short-Rib slider with polenta fries! 


Looks delicious, huh? 


Short-Rib Slider

Pretzel slider buns
Chopped/Shredded leftover short ribs
Aged gouda cheese
Horseradish sauce

Slightly toast your bun in a toaster oven. Take out and spread horseradish sauce on both sides. Take bottom bun and pile on the short rib with a few thin slices of cheese. As much as you like. Toast bottom bun with toppings until cheese is bubbly. Toast top bun until desired crunch, just doesn't need to toast as long as the bottom. 


Polenta Fries

Leftover polenta
2-3 Tablespoons of butter (Depending on how many fries you make)
Dash of salt

Your leftover creamy polenta will thicken overnight in the fridge. Being in a casserole dish you can take a slice out and easily cut it down into strip fry shapes. Melt butter in a pan over medium high heat. Saute fries rolling around to all sides and allow to fry until all sides have a crunchy golden consistency. Allow to dab dry on a paper towel.

Serve Slider with fries and ENJOY!


Tuesday, October 21, 2014

Dirt

Remember back in July when I told you this recipe was coming? Well apparently my idea of soon is within 5 months.  I made this for Harlee's ladybug birthday party but I make it a lot for camping.

This is one of my favorite desserts.  My mom used to make it every single time we went camping as a family.  Needless to say a long day of four wheeling, followed by a campfire and a great dinner, always meant dirt was next. 


You will need:
1 package of oreos
1 package of vanilla waffers
1 tub of cool whip
1 large box of instant vanilla pudding
1 box of cream cheese
3 cups milk

In your food processor crush the oreos and vanilla waffers. Mix them up and set them aside.
Mix together your milk and vanilla pudding mix. Let stand for a few minutes til it starts to thicken.  Whip in the cream cheese and cool whip.

Find a pretty glass dish or clear cup and layer the cookie mix first.  Alternate cookie and cream and top with cookie mix.

Once it's cold it will be super yummy! It also freezes well so you can make it ahead of time.

Click to Print!


Friday, October 17, 2014

Biscuit Pizza

I'm still alive.......GASP!  I made the girls (Doylenn and Mia) promise when I agreed to do this blog with them that they wouldn't hold me to a time table for posting........it's been a long time for sure.  Hope all is doing well....

Spent today driving over 100 miles one way to attend the memorial service for a very dear lady who was one of my rocks growing up.  I'm honored to say that I knew she considered me "one of hers" and she was such a giver there were many of "us."  I will miss and love you always Georgiana!

Anyway, after a long day of driving and remembering a loved one, the idea of fixing dinner seemed like a daunting task.  Was catching up on Facebook when I saw a share about a pizza pull apart bread.  I didn't want to think about making something like that but it made me start thinking about what I had in the fridge and pantry.  This is what I pulled out:


I spritzed my jelly roll pan with some olive oil out of my Misto pump sprayer -- they come in quite a few colors and can be purchased at Amazon Misto oil sprayer.  They have other listings so be sure to do a search and find your color choice and quantity.


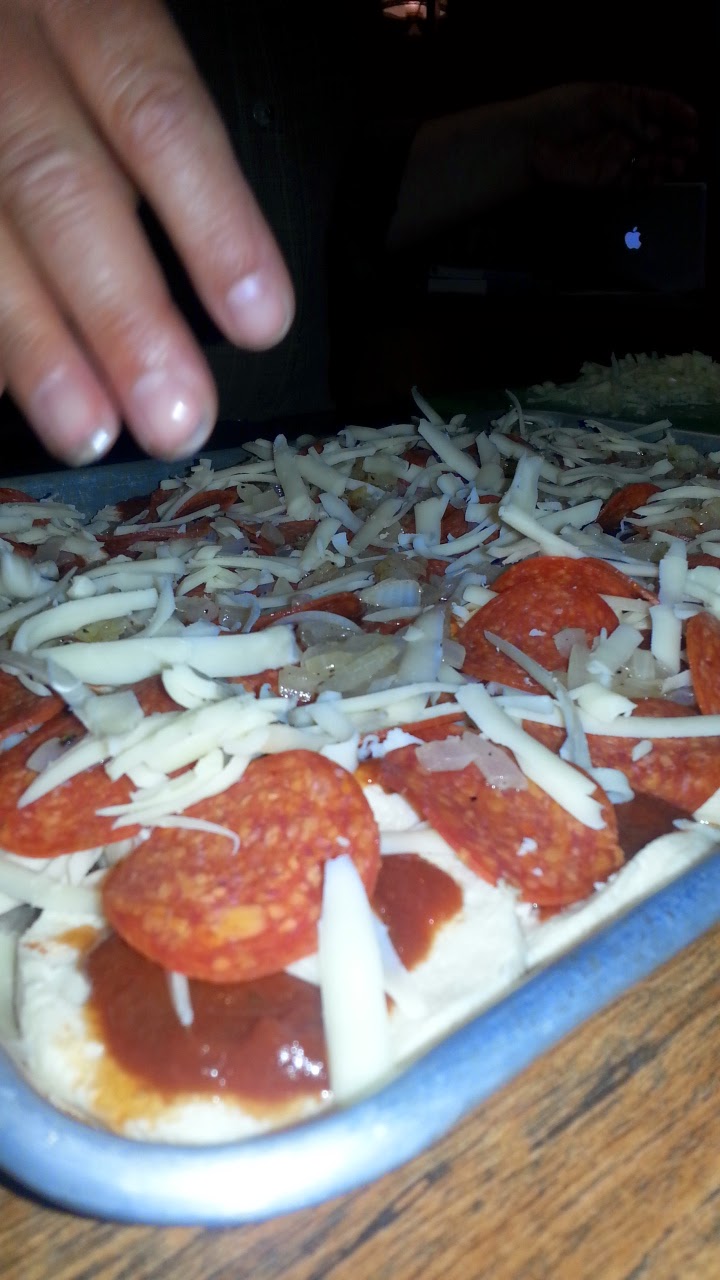
I used a serrated tomato knife to slice the canned biscuits in half so it wasn't so thick.  You could smoosh these all into a solid dough but I left them separated so it would be easier to cut. Then I spread the halved biscuits in the jelly roll pan.


Mia was here so I had her saute' some chopped onions.  She threw in a little butter and they came out beautiful and translucent.


I spooned some jarred pizza sauce on the biscuits.


Then I sprinkled it with some grated Monterey Jack cheese (that's what I had).Then I put pepperoni slices on the biscuits and sprinkled on the sauteed onions.  Then followed that with more cheese.


Then I put it in a preheated oven at 385 degrees F, for about 20 minutes until it was starting to brown the cheese and the biscuits were cooked through.


And it was delicious!  And so simple.  You can add any pizza ingredients you like or love.  Quick dinner and a change up from frozen pizza from the freezer.  I had someone go back for seconds and ask for leftovers for his work lunch tomorrow so you know it was a win.  Enjoy!


Thursday, October 16, 2014

Braised Garlic Short Ribs.


....PART TWO....
...Recipe for what do drown your polenta in...

Time to complete our hearty delicious meal. Come home from the pumpkin patch to this warm meal that is bound to please. Very fitting for the season an abundant in flavor! Tender short ribs falling off the bone in a rich sauce. Serve over a creamy, cheesy polenta... Ahhh heaven. Pioneer woman inspired this recipe but I had to twist it up a little. 

Have I convinced you yet? You gotta try it! 

STAY TUNED NEXT WEEK FOR SOME LEFTOVER RECIPES FROM THIS MEAL!

I'd hand you a fork if I could...

Braised Garlic Short Ribs
Heat your oven to 350

*FOR THE SHORT RIBS*

8 Short ribs
(You can do a pre soak in wine to help with how tender they get.)
5 Strips of bacon
Montreal steak seasoning
1/2-3/4 Cup flour

Sprinkle steak seasoning over all the short ribs until lightly coated. Roll each rib into some flour until fully coated. In a dutch oven cook your strips of bacon until cooked. Remove to a plate leaving grease in pot. Brown your short ribs in grease. Not more than 25-30 seconds on each side. Remove them to a plate.

*FOR THE JUICE*

1 Yellow onion, diced
2-3 Carrots, diced small
2 Tablespoons minced garlic
2 Tablespoons Olive oil
2 Cups beef broth
2 Cups wine (Dry not sweet variety.)
1/4 Cup balsamic vinegar
Dash of salt & pepper 
Sprig of rosemary 

After taking out ribs use same pot and saute your veggies & garlic in leftover grease and olive oil. Allow to become slightly caramelized.  Add wine and allow to boil for a few minutes along with veggie mixture. Use a whisk and scrape all the good stuff from the bottom of the pot for extra flavor. Now add broth and allow to simmer together for about 5-10 minutes. Add salt & pepper and your cooked bacon from earlier. Using tongs place your ribs into the HEAVENLY mixture in your pot. Make sure they are completely submerged. Add your sprig of rosemary to the top and cover with dutch oven lid and bake in oven for 2-3 hours. 

After 2-3 hours take pot out of the oven and let sit for about 20-30 minutes. After that remove the lid and allow the heavenly aroma to fill your kitchen. At this point you will have no choice but to eat it because... well.... how can you not? Enjoy!

Serve over Creamy MICROWAVE POLENTA for a delicious combination!


Wednesday, October 15, 2014

Creamy MICROWAVE Polenta


....PART ONE TO A DELICIOUS MEAL....
...Part Two Tomorrow...

These cold fall days have had me in the mood for a warm hearty meal. With some family raised beef in the freezer, short ribs seemed fitting for the mood I have been in. Anyways when I think short ribs I think soft polenta to serve it on. I grew up eating polenta in my Swiss family, Even included it on the menu at my own wedding. Its a delicious and inexpensive but above all CLASSY side dish. Years ago in Switzerland it was considered peasant food because its JUST corn meal and water. Thats it. There is so much you can add to it to make it a jazzy amazing dish. 

Here is a quick easy way to whip up some polenta in your home in short order.

Want a spoon? fork? you hands? Go for it! Don't blame you!! 

Creamy Microwave Polenta
2 Cups cornmeal
7  Cups water
1 Tablespoon olive oil
2 Teaspoons salt
4 Tablespoons butter
1/2-3/4 Cups shredded cheese (Any kind your prefer, parmesan, cheddar, jack, gouda)

Combine all ingredients except for butter and cheese in a large glass or stoneware dish that leaves enough space for water to bubble up without overflowing. Cover tightly with saran wrap and microwave on high for 14 minutes.
Carefully uncover dish and stir your mixture. Should still be watery but beginning to thicken. Add a splash more water if your mixture is clumpy or stiff. After stirring re-cover and microwave on high for another 12-14 minutes.

Again, carefully uncover and stir. Polenta should be thickened but not stiff. Add butter and cheese and stir in. Taste and add anything more of anything that you desire.

Serve as a side dish or under PART TWO to this amazing meal.


Tuesday, October 14, 2014

Cheyenne's 2 year old birthday interview

Instead of doing three posts in a row of Cheyenne interviews I decided to stretch them out a bit for before she turn four later this year! Enjoy this blast from the past!

****************

I decided to try and do a two year interview with Cheyenne because she is a supremo talker.  I had to spread it out over a couple of days and she didn't answer all the questions but she did pretty good.  I can't wait for next year when she will answer all of them!


What is your name?  Me Cheyenne (while proudly patting her chest)
What is your mom's name?  You Mommy!   
What is your favorite color? PIIIINNNNNKKKKKKK
What is your favorite toy? aaaaa puppy
What is your favorite cartoon? Zoomie (Team Umizoomie)
What is your favorite game? game
What is your favorite snack? aaaa fruit snack
What is your favorite animal? a doggie
Which do you like more, hunting or fishing?  Fish
What is your favorite book? story book
Who is your best friend? kitty cat
What is your favorite cereal? Popcorn
What do you like to take to bed with you at night? Harwee


I love you Cheyenner Nanners! Cake face and all

Friday, October 10, 2014

Flashback Friday: Homemade Vanilla Coffee Creamer

Welcome to Flashback Friday, where we bring you one awesome post from the past you may have missed. Enjoy!


**************************

My husband has decided to start drinking coffee in hopes that he will quit drinking so many energy drinks.  But he likes his coffee sweetened.  So do I, that's why I normally don't drink coffee. All the sugar first thing in the morning puts my blood sugar all whacked out all day long.  After I made this though I had to try some.  It's really easy to make too.  I saw the recipe on pinterest of course...where else do I get all my ideas?


1 can 14 oz sweetened condensed milk
14 oz whole milk
1 tablespoon vanilla
 Pour sweetened condensed milk, whole milk and vanilla into a container and shake it like mad.

Click here to print recipe.


This is way yummier than store bought!  I'm going to experiment with more flavors.

Wednesday, October 8, 2014

Garden Saute


This past summer my garden determined what I cooked. I'd go pick what was ready and brain storm as I did it. Thats how this recipe was born. Its ridiculously easy and you could throw anything in it. Its delicious, too! This recipe has it all. Clean eating and loving every bite of it! You have got to try this!

Now being October and my garden season coming to a close I'll miss my shoot from the hip meals from my garden. But you can always get this produce at your local grocery store so this dish can go year round!

Wanna fork?

Garden Saute

1 Pound ground burger meat (Elk, beef, whatever you have!)
1 Yellow onion, chopped
1 Zuchinni, chopped
1 Yellow squash, chopped
1 Pound green beans
4 Green onions, chopped
2 Tablespoons chopped chives
1 Tablespoon minced garlic
2 Tablespoons butter
1 Teaspoon montreal steak seasoning (Add more as desired.)

Cook your burger meat in steak seasoning. Once cooked set aside and saute your garlic in butter until fragrant. Add veggies and saute until cooked. Once cooked add burger to veggies and stir together allowing to saute for about five minutes or so.

Serve with warm Dinner Bread and enjoy!


Click here to print!


Monday, October 6, 2014

Thankful Tree

It's getting nearish to thanksgiving, so for once I'm posting this in time for you to make your own.  Go me! I wouldn't count on it happening again anytime soon, though I do try!

Give thanks in all circumstances; for this is the will of God in Christ Jesus for you.~ 1 Thessalonians 5:18 ESV

We decided to do a thankful tree last November(and will do another this November).  My original plan was that we would all pick one thing to be thankful for every night at dinner.  I didn't know how well the girls would do with this.

They love watching the tree fill up so much that they had a having a hard time containing themselves to just one a day.  And who am I to tell them when to stop being thankful? I refuse to stop them.

They have been thankful for everything and anything.  Cheyenne is thankful for snakes(gross!), the vacuum, leaves, and apples.  Harlee is thankful for wish presents(and if she ever gets a wish present she is going to wish for a dragon that eats hearts), jugs, and blue sky.  They are both thankful for their mom and dad, each other and God.  Just to name a few.

I do love these girls and I love seeing what they are thankful for.  I couldn't of imagined how big our tree was to get by the end of the month.


One day, Harlee said she was thankful for today.  How profound for a five year old! I have to say today didn't even come to mind for something to be thankful for, but it should of.

I'm thankful for thankful girls, who think of new things to be thankful for everyday.  They think of the little things, the big things and everything in between.


Here is our finished thankful tree.  It has been so much fun.  The girls actually ask to do it in the evenings.  We got these leaves, which made it super easy, but I didn't realize how many of them we would use. I only have about half left, but I am thankful we are thankful for so many different things.  I'm glad I didn't cut all those leaves out of construction paper! That would take way to long and I just don't have time for that.

Friday, October 3, 2014

Flashback Friday: Southwestern Macaroni Salad


Happy Flashback friday everybody, and apparently Fourth Of July, too! Rewind back with us and enjoy this old post with a delicious recipe!!!


HAPPY FOURTH OF JULY!!

 Best wishes for a safe and fun holiday full of memories to you all from Crafty Honey Badgers! 

Isn't this holiday the greatest? Well every holiday is great in its own way, but independence day is different! You feel a pride to be an American and thankful for all the brave men and woman who have fought to keep it AMERICA! Plus, a hot summer day on the lake ended with some fireworks is pretty hard to beat!

Kids playing with anticipation for the firecrackers when night fall covers. Family gathering and catching up around a BBQ. People wearing red, white and blue with lots of cheer. Parades bringing communities together to celebrate our freedom. This holiday brings us all as one together to be proud of this great country we live in! For one day we all can agree on one thing and thats what a beautiful country we live in and how we are blessed in so many ways. Holidays seem to have that effect on people and thats what I love about them. Opinions separate us quite often but holidays bring a spirit from deep down in us that makes us look one another eye to eye. As a country we can wave our flags and rejoice in cheer for old glory. Our beautiful country the United States Of America.

So I say it again, we wish you all a cheerful, sunny fourth of July. May the fireworks shoot high and light up the sky above you and fill you with cheer! Whether your on the mountain staring at the stars, or down on the streets of your hometown celebrating with your community we wish you a blessed day!

Anyways what's a holiday without a great recipe? Heres a last minute save for a delicious side dish for any of you who may be running behind today! Fourth of July or not, This recipe is a great all american side dish with a twist that will please any hungry appetite! 


Grab a spoon and crack your screen, you know you wanna!

Southwestern Macaroni Salad

1 Pound macaroni or ditalini pasta (Pictured is ditalini)
5 large pieces of roasted red peppers. (I use jar kind from condiment isle)
4 Green onions
1/2 Cup mayo
1/4 cup milk
2 Teaspoons sugar
1 Teaspoon chili powder
1/4 Teaspoon salt
LOTS of black pepper

Boil your pasta on medium high heat until al dente. Drain and rinse with cold water until pasta has cooled off. Pour pasta in large salad bowl.  Chop your peppers and onions and stir into pasta. Whisk your milk, mayo and spices together and pour over pasta mixture. Stir until everything has combined and that heavenly dressing has touched EVERY piece of pasta!

Serve with your favorite summertime meals and enjoy! Or just eat a bowlful by itself.. Been there, done that! 

Have a GREAT fourth of July everybody!


Thursday, October 2, 2014

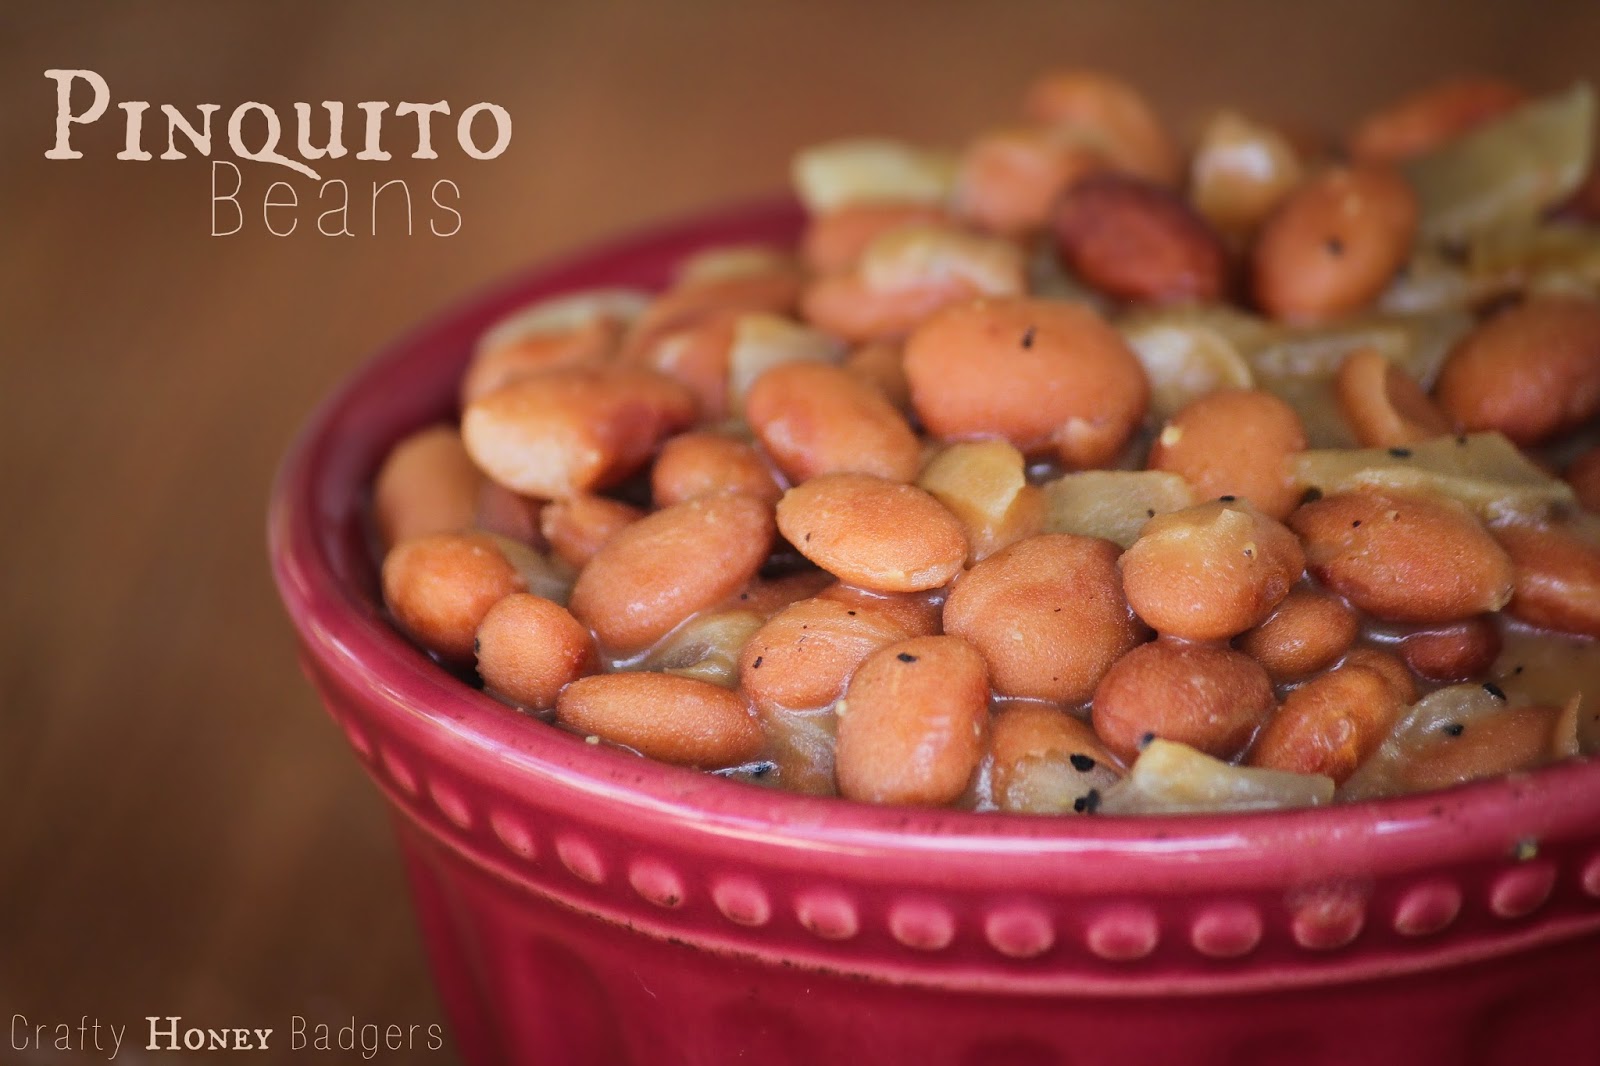
Pinquito Beans


You want an amazing and easy side dish that is great to have for a last minute save? Look no further! This recipe is delicious and I promise its not only because its easy as 1, 2, 3. It packs a bold combination of flavor. I must thank my Mom for this recipe. She always amazes me on what she can whip up in the kitchen in a short order and it still hold bold flavors that linger on your tongue tempting you to have more. 

With fall among us and the temperatures dropping and the air getting a little more crisp. This is a nice warm recipe to come home to. Specially with some corn bread! Give it a try and make bringing dinner to the table a little bit easier while keeping the delicious side!!

Want a spoon?


Pinquito Beans

2 Cans pinto beans --One drained one not
1 Yellow onion chopped
1/2 Teaspoon chili powder
1/2 Teaspoon cumin
1/4 Teaspoon garlic powder
1/4 Teaspoon salt
1 Teaspoon olive oil

Saute onions in a pot in olive oil. Once translucent add beans and spice and allow to simmer all together for 10-15 Minutes. 

Ta Da! Eat alone (I don't judge, I do that!) or serve as a side with a delicious steak or Barbeque'd chicken! 


Wednesday, October 1, 2014

Dave Ramsey Money Envelopes

Once I saw these Dave Ramsey money envelopes I just knew I had to make a pile for myself.  Before we were just using regular paper envelopes and every other second I was switching one out because they were getting all haggard.  And since your on a budget these can be made entirely from scraps. Can you say upcycle? Upcycle! Let's do this!


1. Cut two squares (matching or not!) 7 3/4'' by 7 3/4''

2. Apply medium weight interfacing to one of the squares. I save my scraps just for this.


 3. Sew the squares, right sides together, leaving a hole to turn it right side out.  Clip the corners.


4. Turn and sew along two opposite sides of your square. 

5. Fold the square in half, bringing the seams together. I like the piece with the interfacing on the outside, but I have made them with the interfacing on the inside fabric and it doesn't make much of a difference.

6. Sew the other opposite edges.

7. Stuff with money.  I also put in a index card where I write what the envelope is for and how much goes in each month.

8. Go forth and multiply.


9. Just look at them...they are beautiful!

Related Posts Plugin for WordPress, Blogger...